David Hockney Inspired Collage.
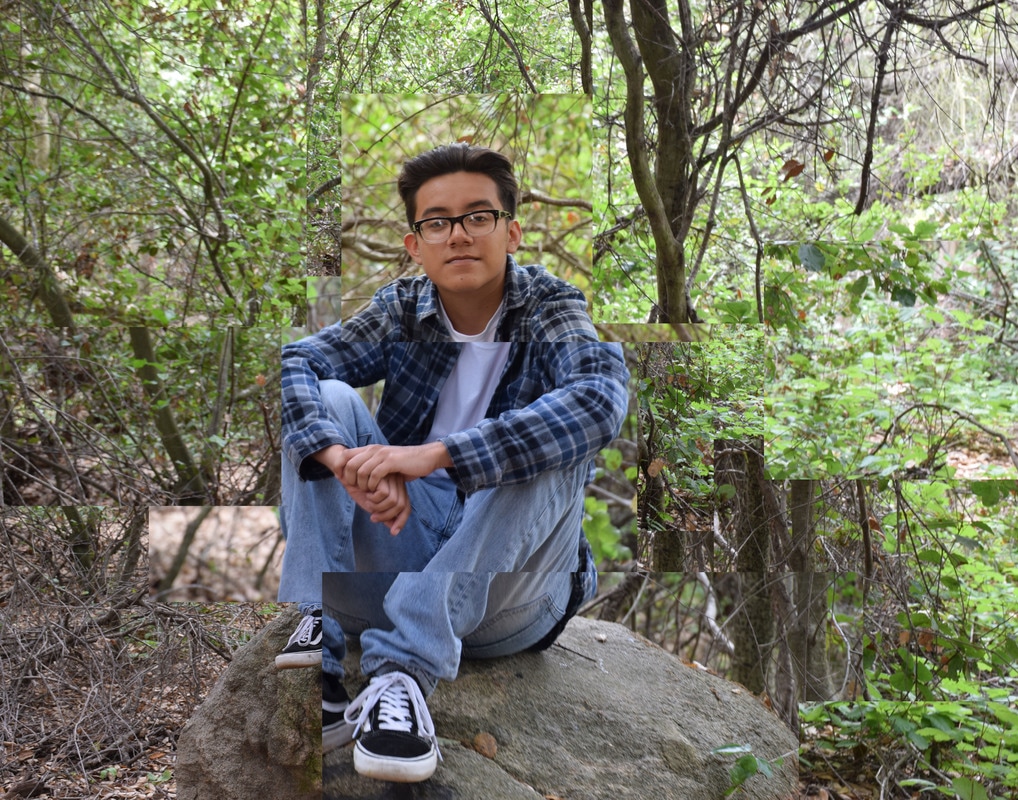
David Hockney was born in Bradford, England on July 9, 1937. He is known for painting. printmaking, photography, and set design. He was involved in the movement of pop art. He attended Bradford School of Art in 1953-1958, and Royal College of Art in 1959-1962. He is considered one of the most influential artists of the 20th century, and has created art work that supported homosexuality before it was widely accepted in the 1960's, along with many other varieties of artwork. One of his styles of art is photographic collages which is what I tried to emulate.
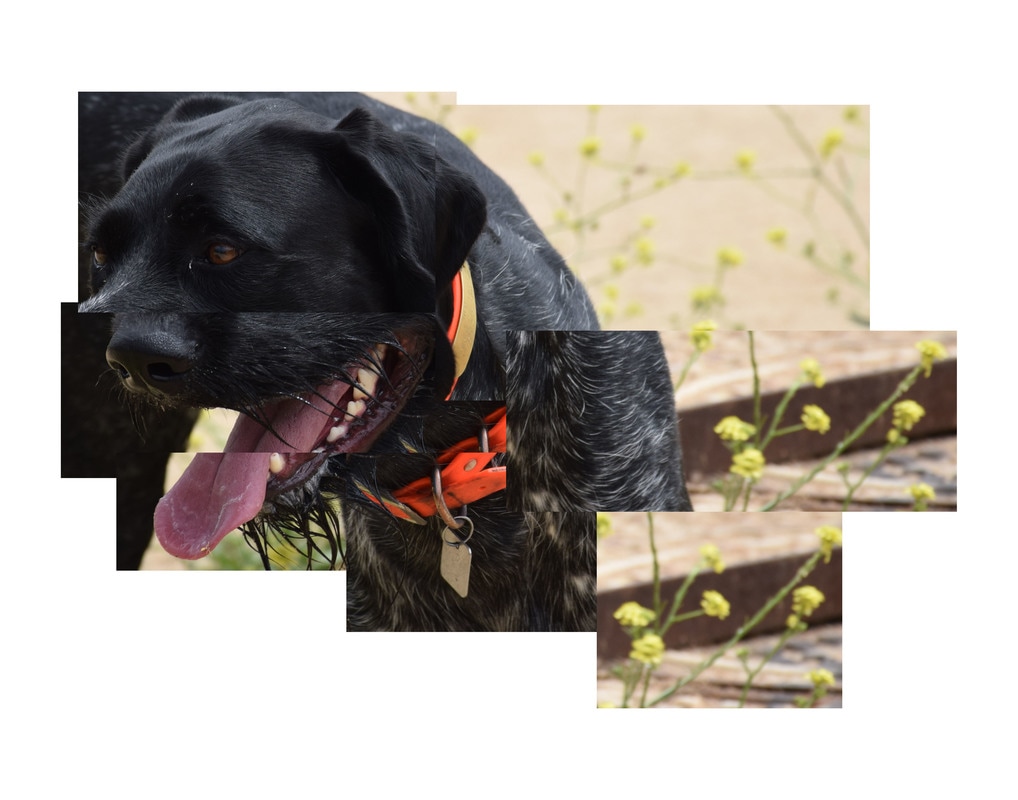
To create this style I had my partner pose and not move. Then I took pictures of different angles and in photoshop I placed the images to create one image. Some of the pictures might looked zoomed in than the others. For the second image I tried to recreate was of the dog and since I only had one photo of the dog and not many of different angles, I used photoshop to get different angles and placed them in different places to try to emulate the style.
To create this style I had my partner pose and not move. Then I took pictures of different angles and in photoshop I placed the images to create one image. Some of the pictures might looked zoomed in than the others. For the second image I tried to recreate was of the dog and since I only had one photo of the dog and not many of different angles, I used photoshop to get different angles and placed them in different places to try to emulate the style.
Magazine.
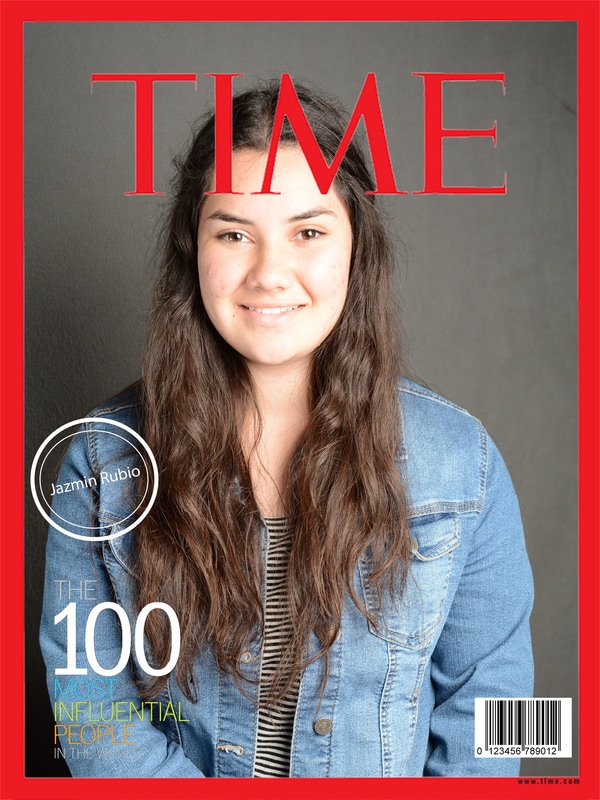
The magazine I chose was Time Magazine, I decided to do this one because I liked how the red gave it some color. To emulate the magazine cover style I chose a photo that was focused mostly on my face because the magazine mostly focuses on people. I then added the TIME tittle with the red around the edges. I also added the text that says the 100 most influential people in the world. Last I added the barcode to make it seem more like a magazine. The set up I used to create this photograph was a grey backdrop with a studio light and a flash on the camera. I used a strobe light which is a powerful flash that is synced to the camera so that it strobes when the shutter is released. You would use it to provide strong studio lighting, and it would be paired with other sources of light. A modeling light is a secondary light source in a studio shoot that allows for a balance in lighting to eliminate shadows and create even exposure. It would be used with a strobe light, generally placed on the opposite side of the subject in order to balance the light. A soft box is a cover placed over a strobe light and guide the light. It is used to channel the light from the strobe and soften it so that the resulting light is diffused cleanly. It also directs the light straight to the subject. A reflector is a flat panel of varying shapes and sizes, but usually circular. They can be either white, silvery, or gold. They are used to reflect light from the light source in order to eliminate shadows or create even and balanced lighting. A grey card is a physical panel with a white, gray, and black strip that is held by the subject in test photos. It is used to allow the photographer to find the perfect exposure so that the gray on the photograph perfectly matches the gray on the real panel. A radio trigger system is a system of transmitters that are attached to the camera and any light sources, especially strobe lights. It is used to allow for wireless connectivity between the camera and light sources so that the flash from the lights is synced to the shutter release in the camera, and it allows the photographer to be more mobile due to the lack of a cord.
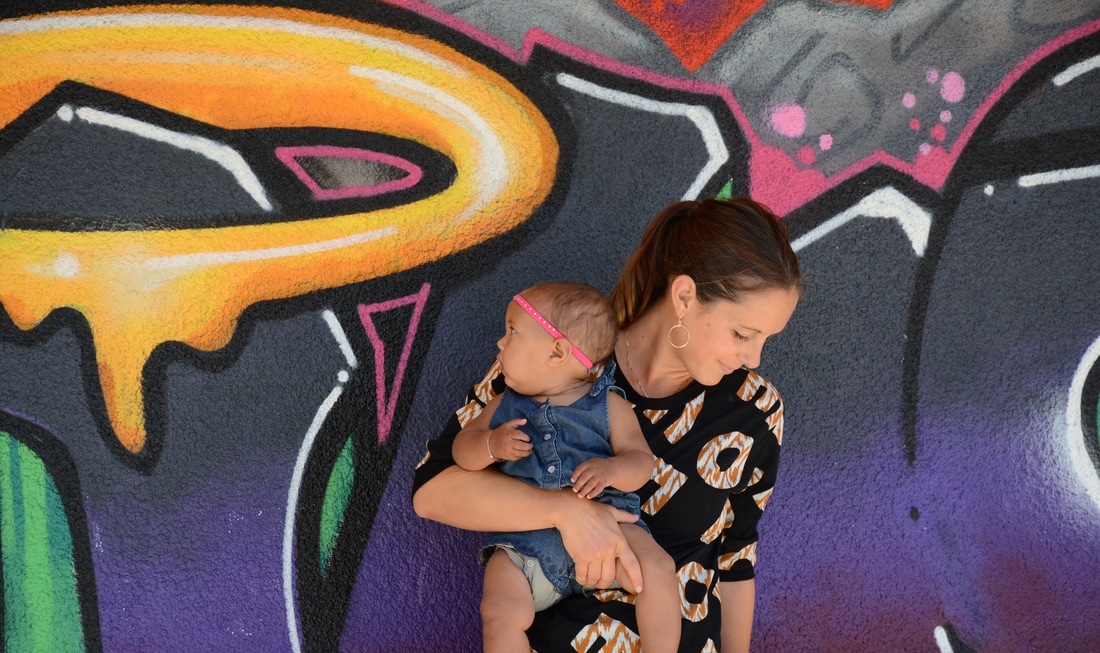
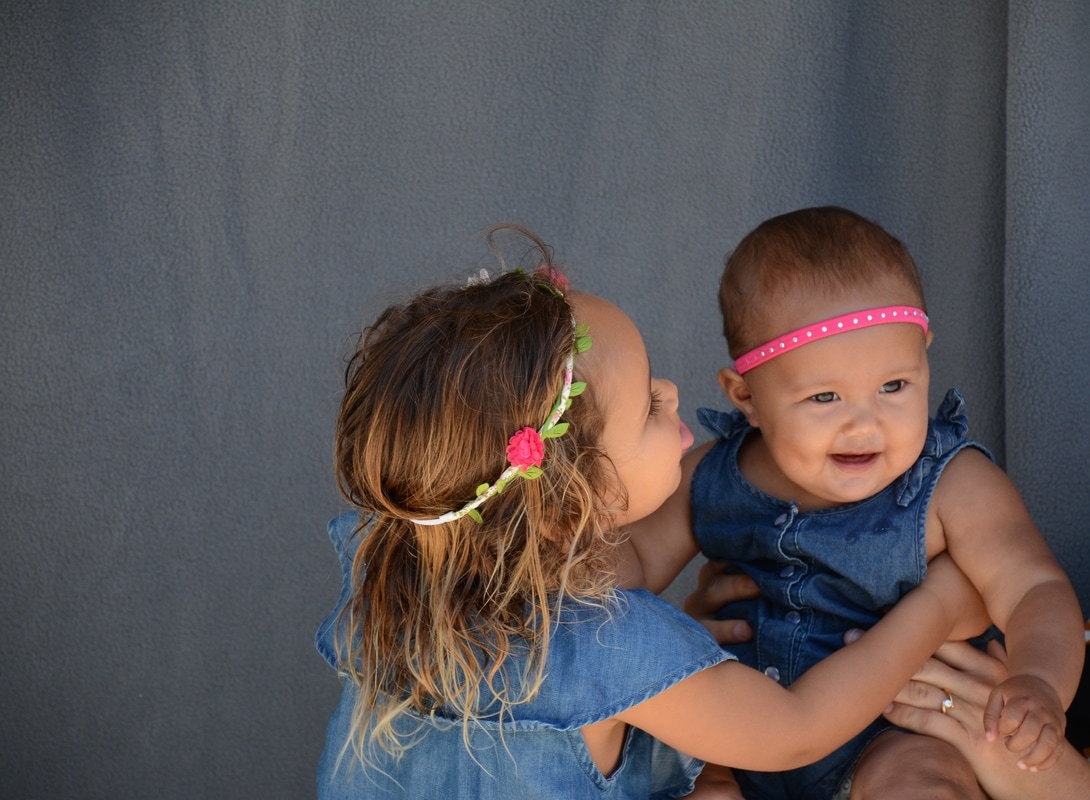
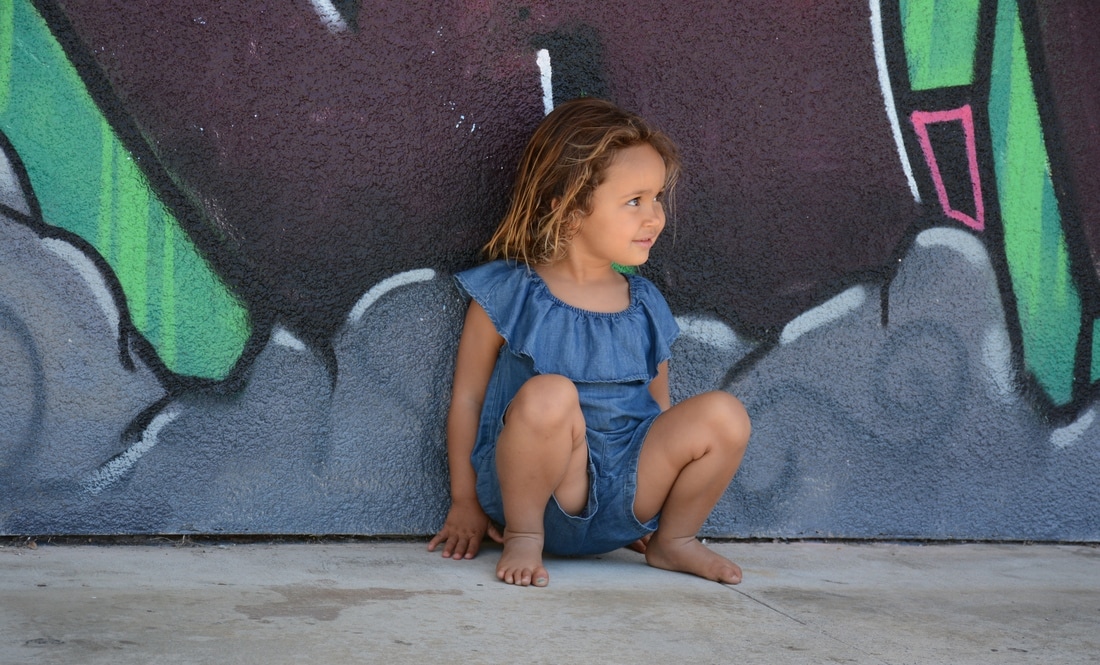
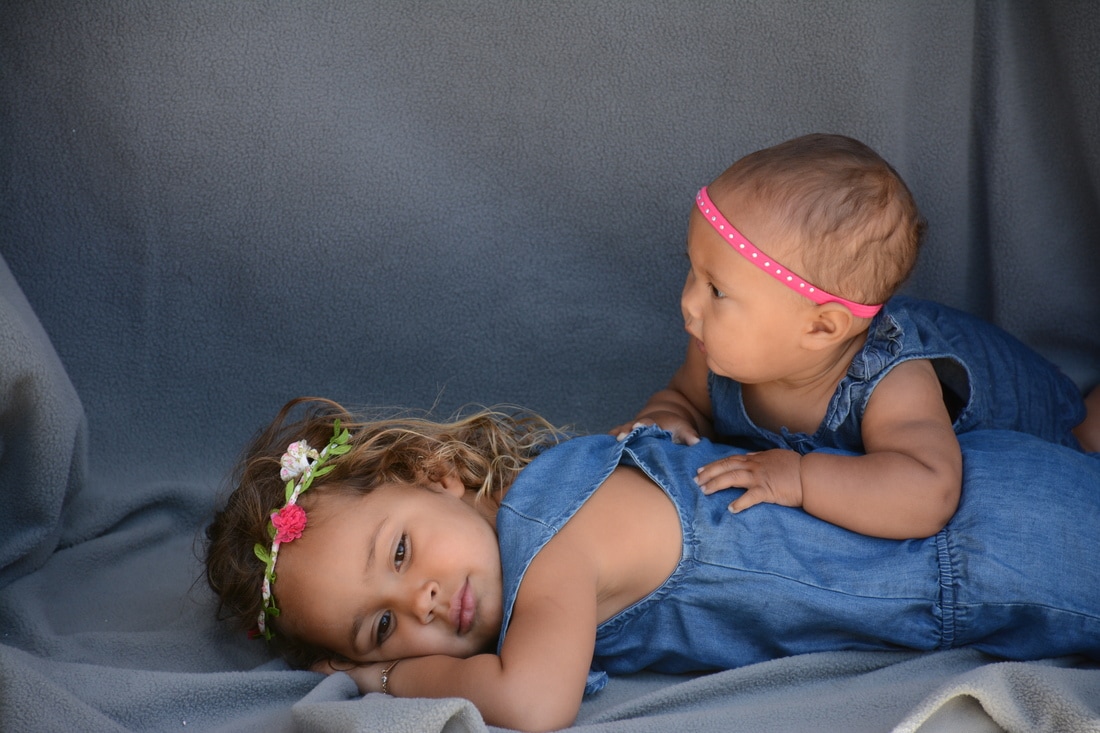
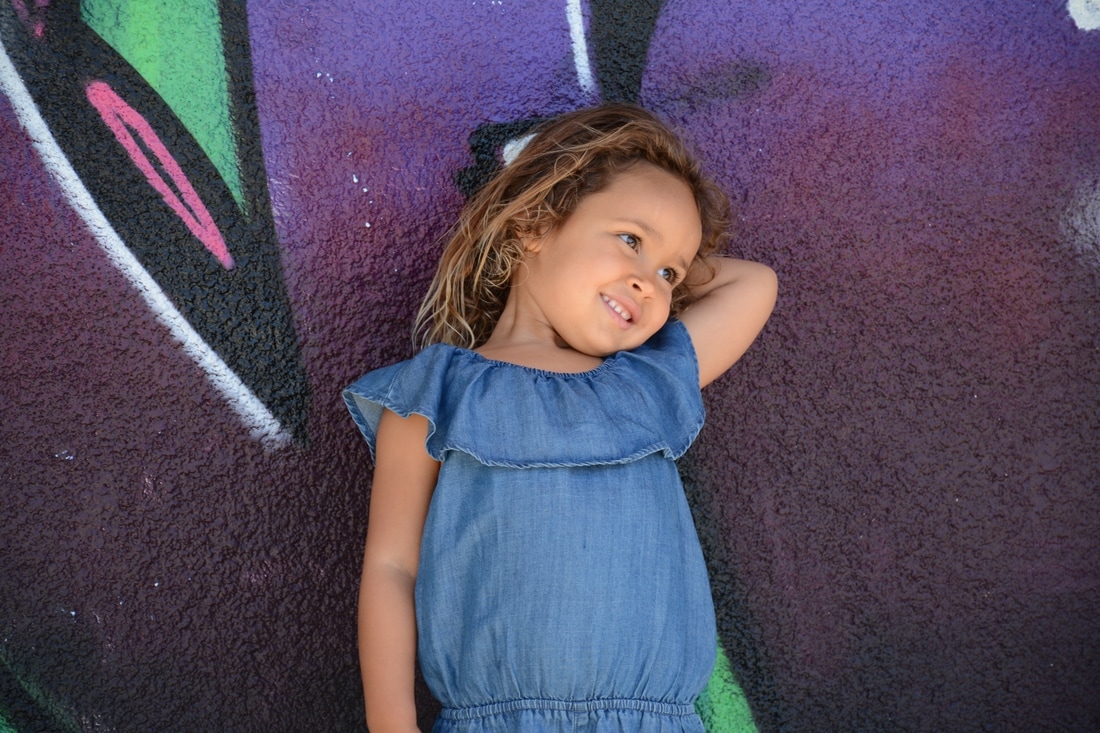
Family.

Lightroom.
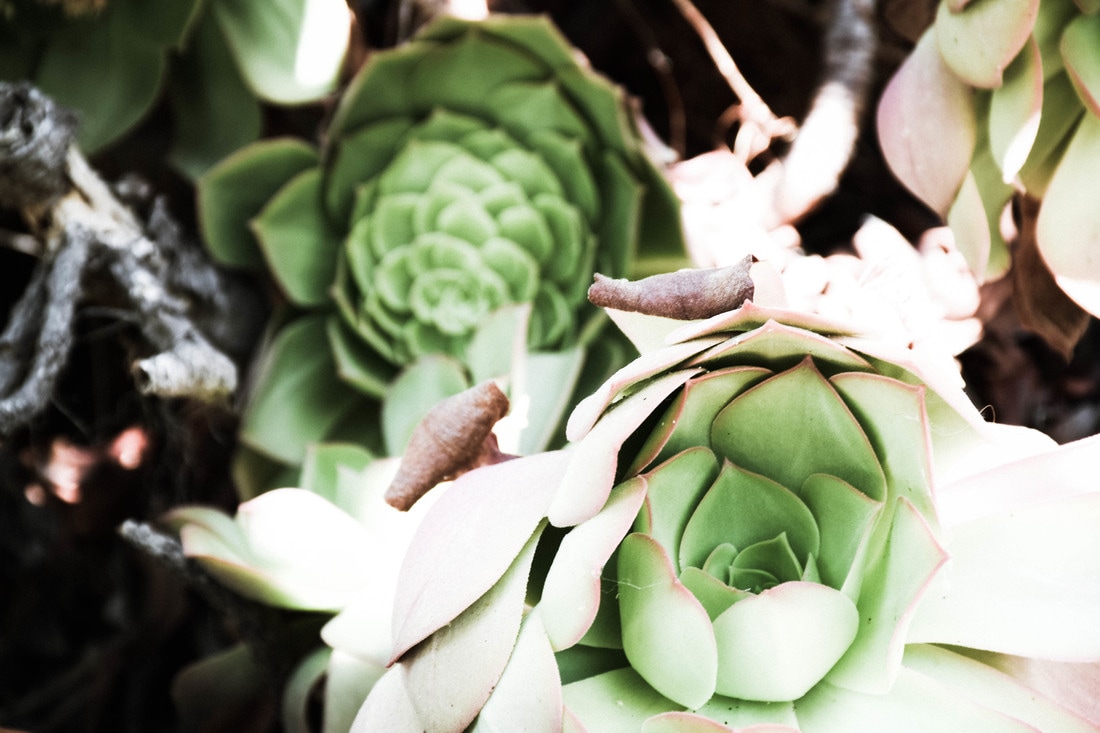
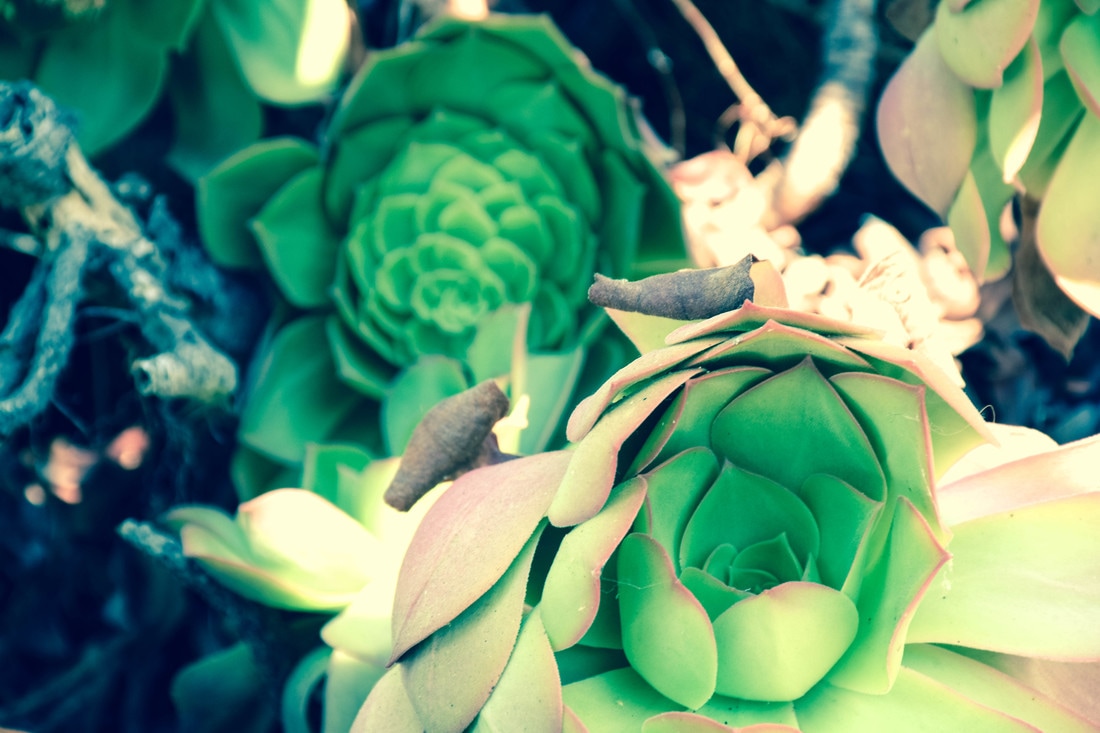
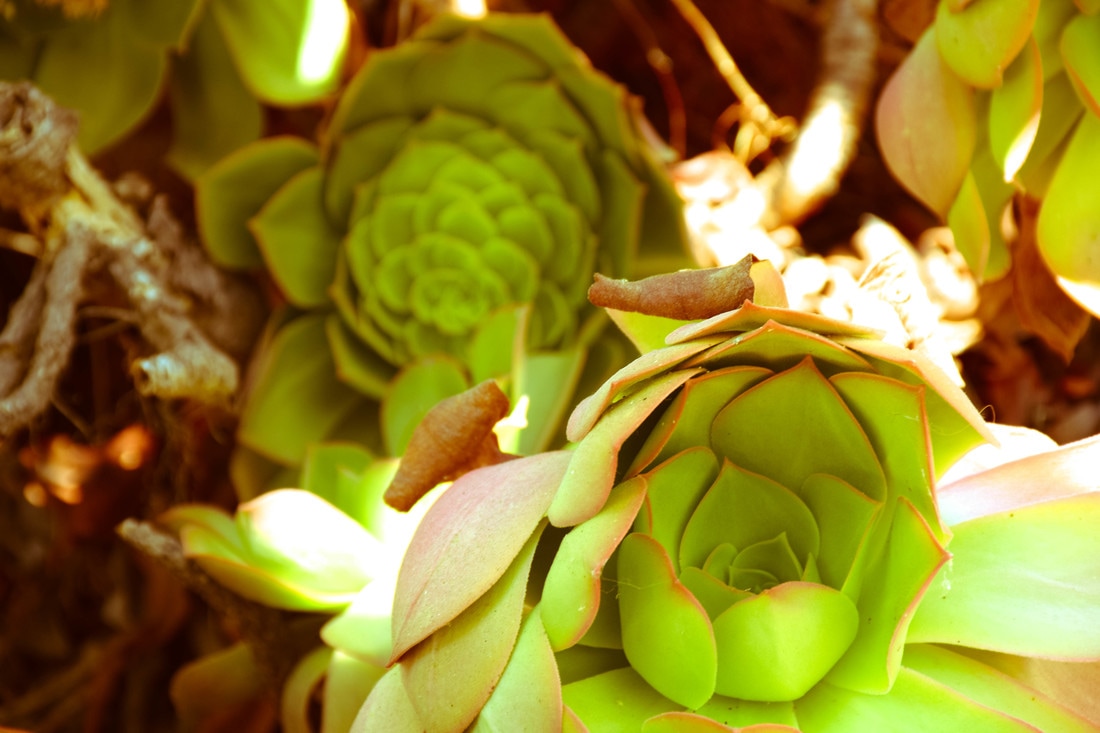
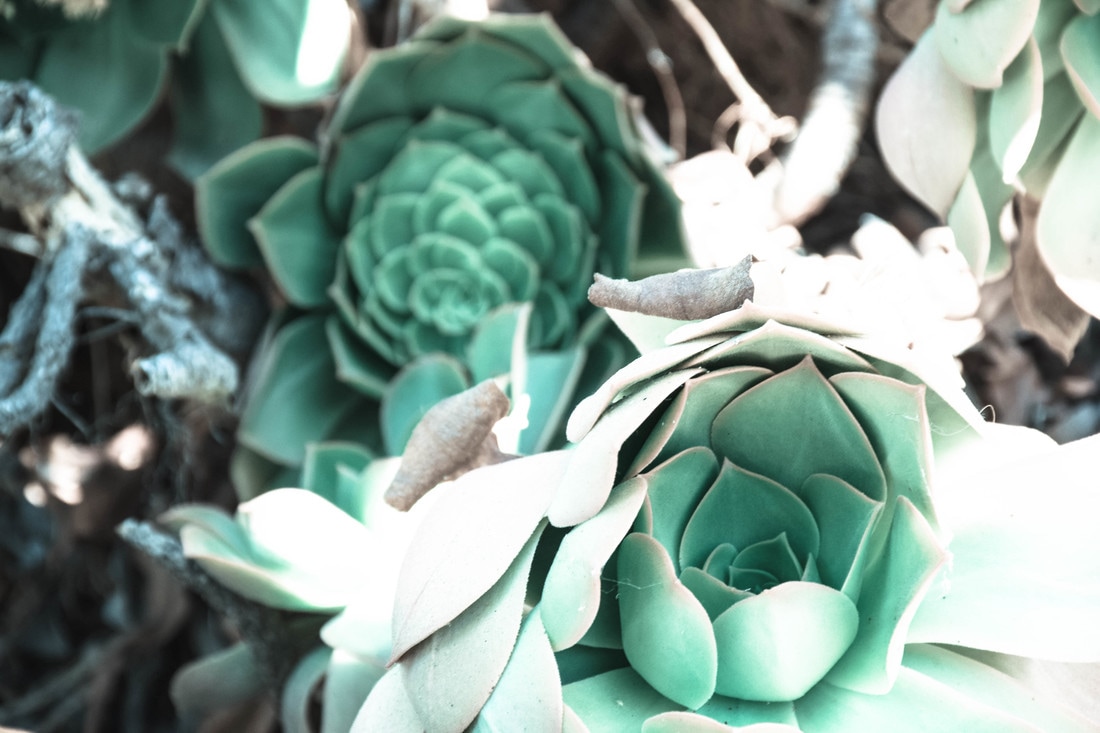
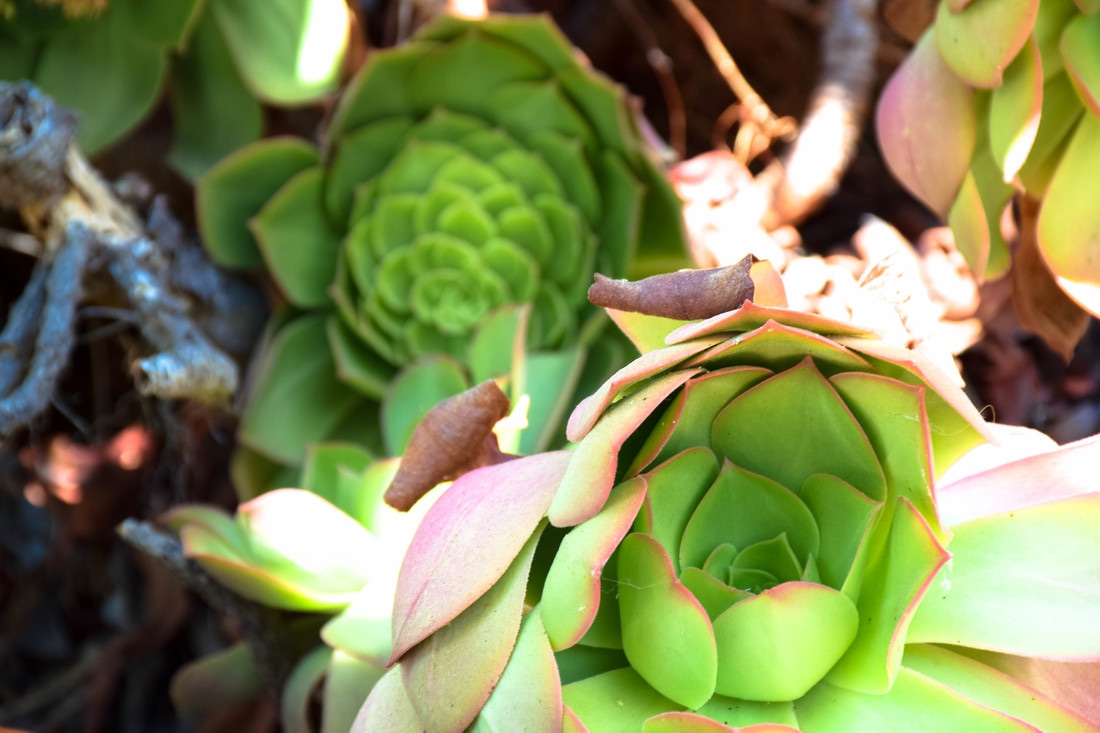
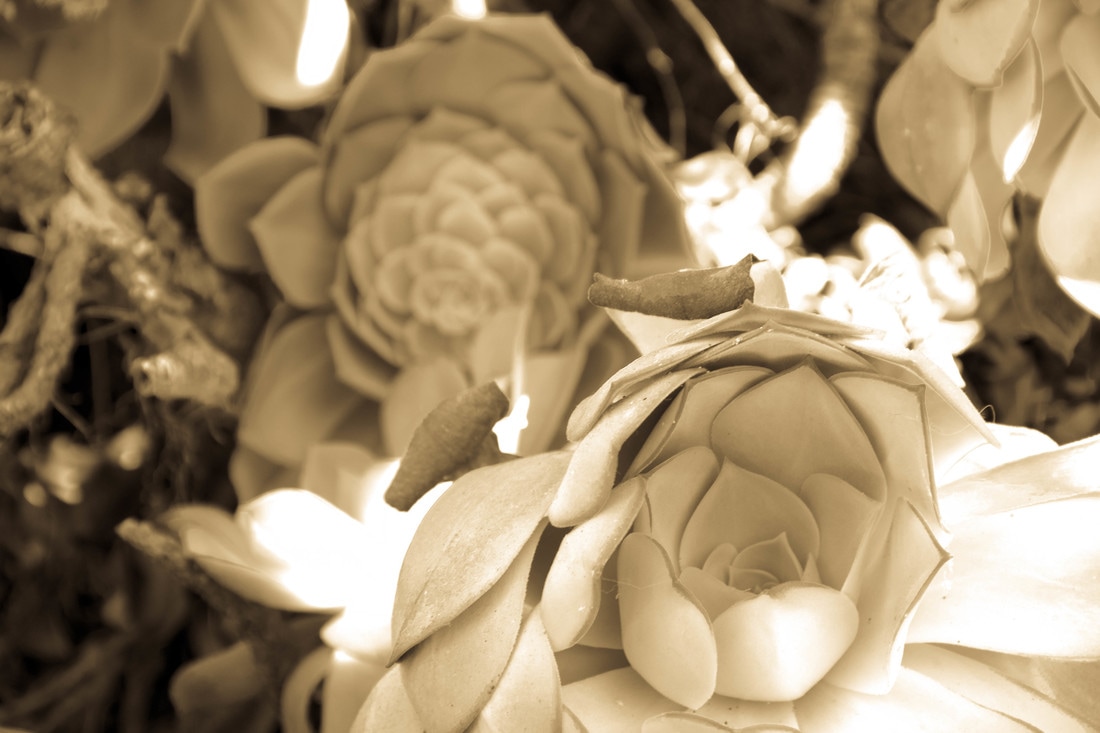
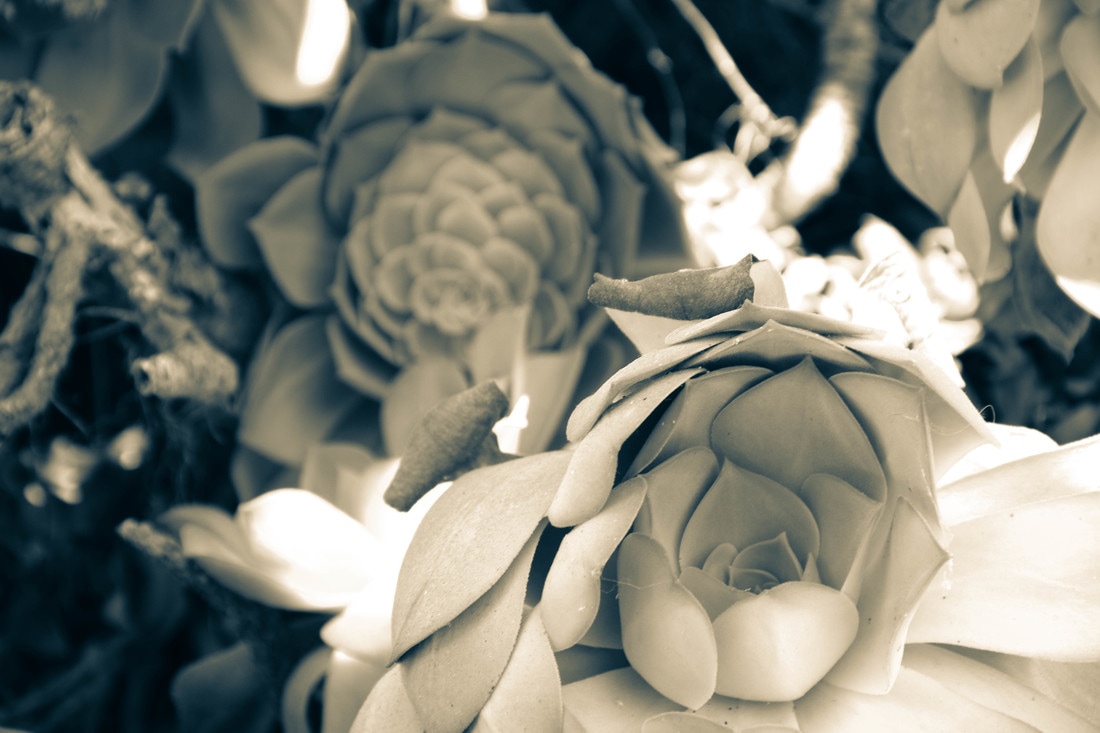
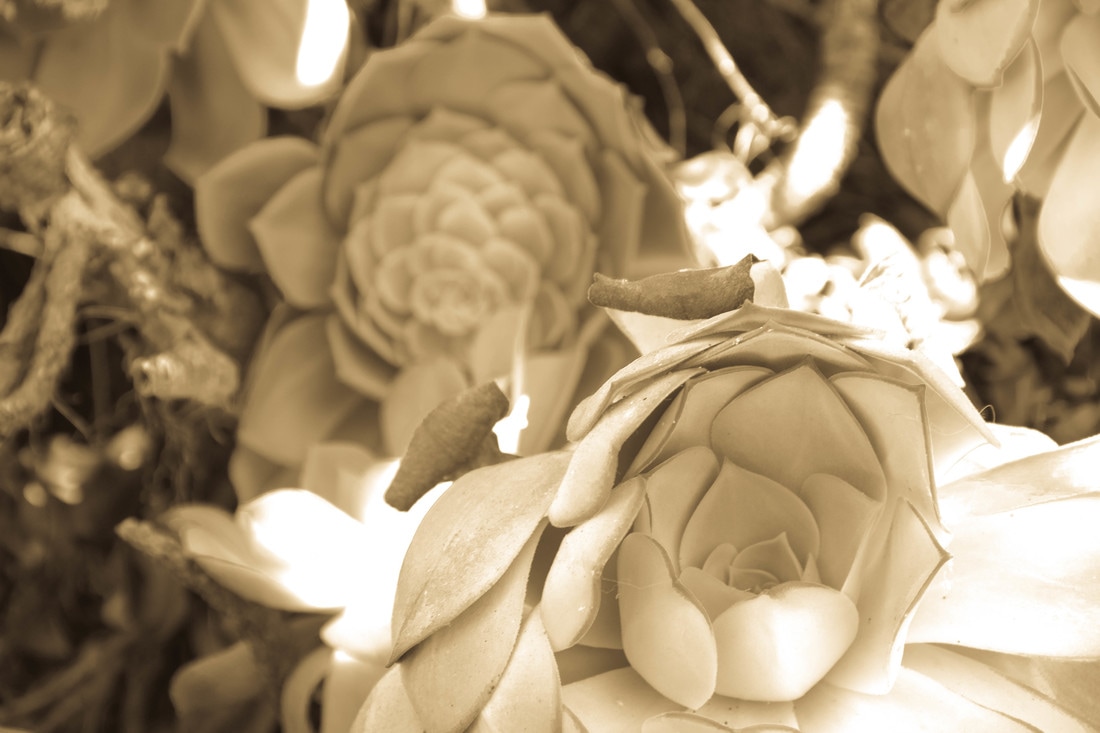
Color presets.
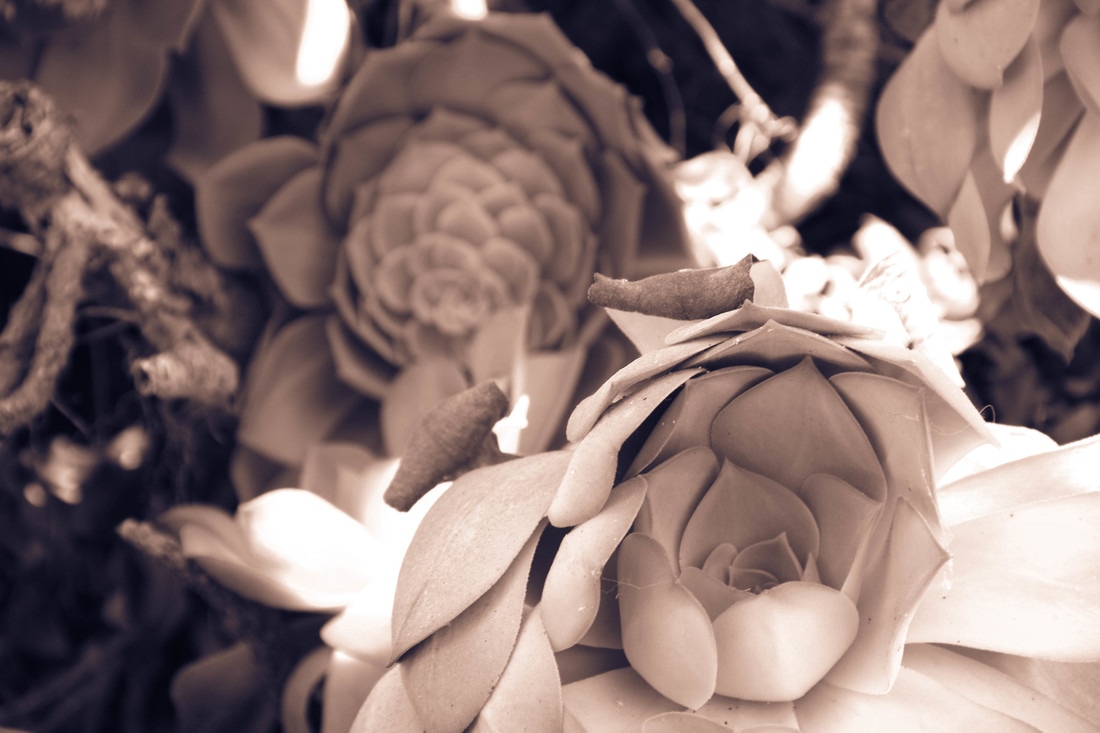
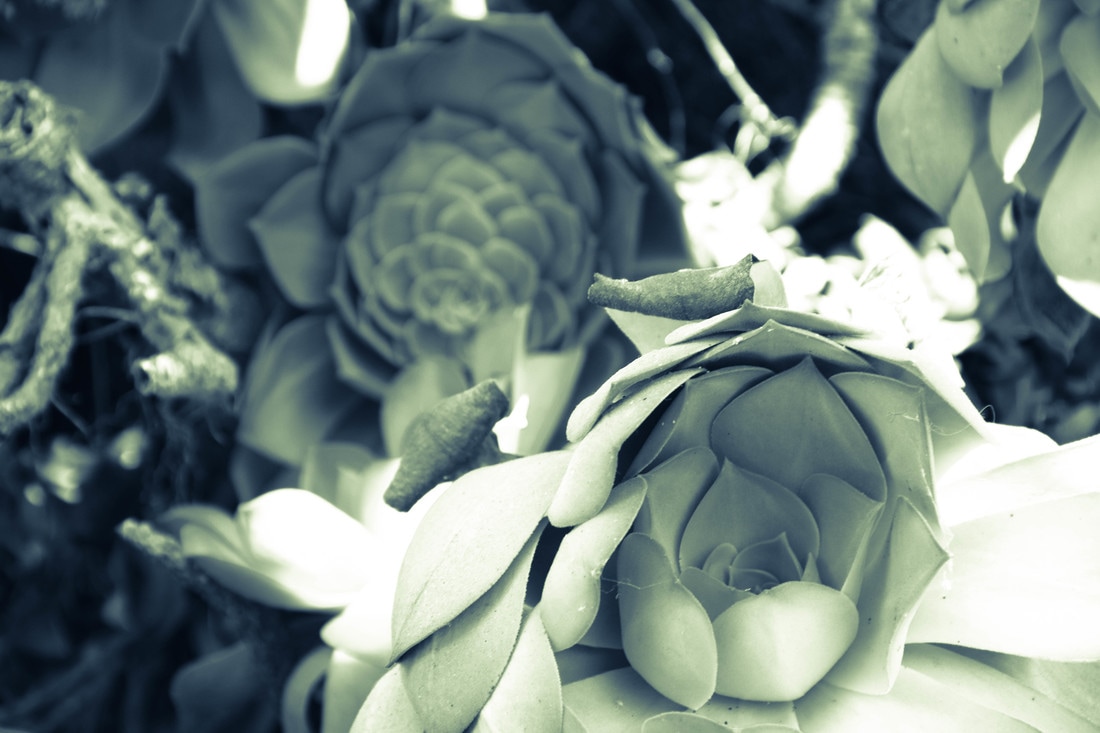
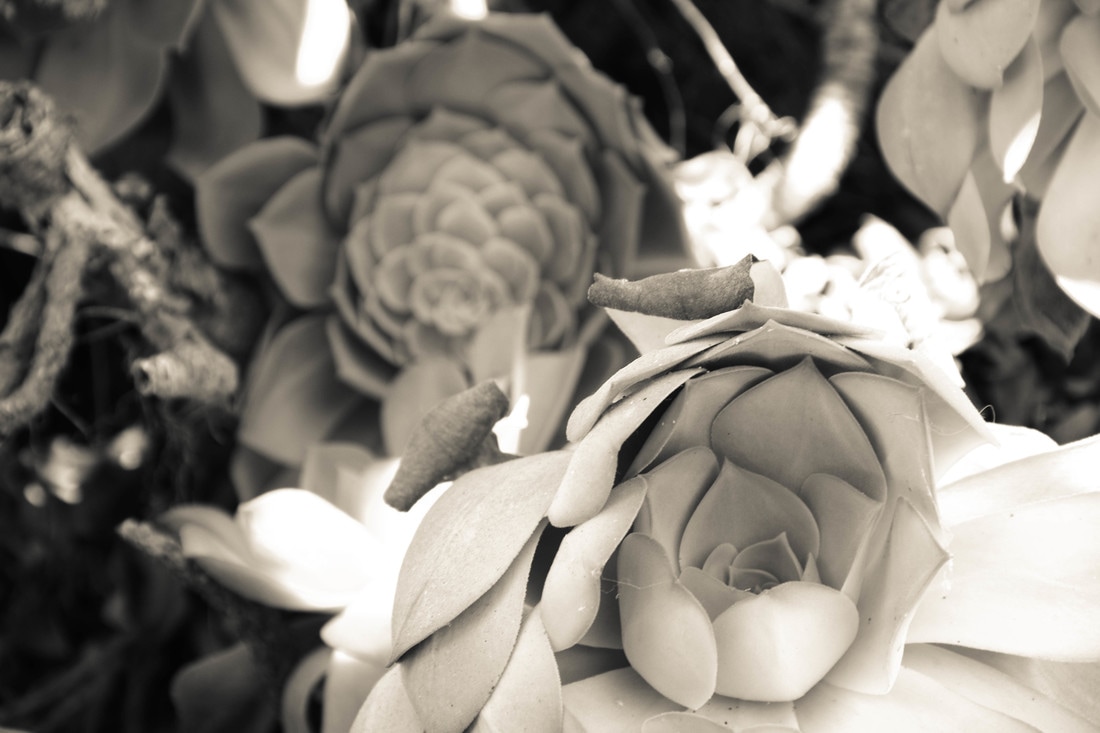
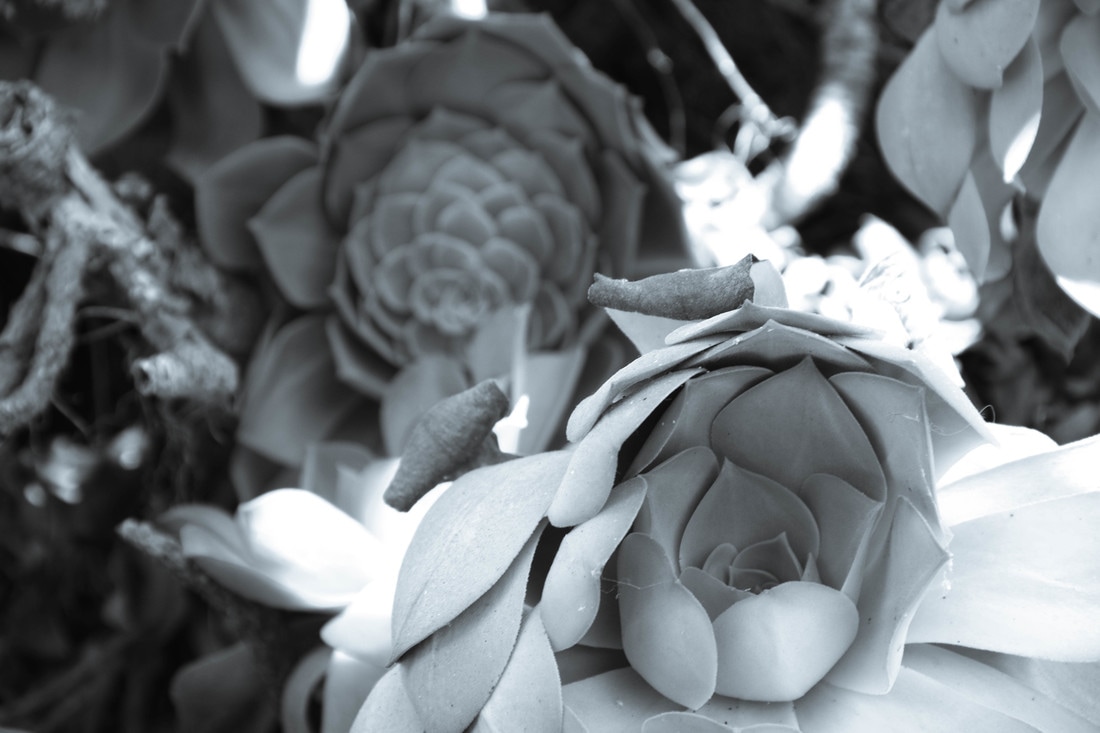
Black and White Preset.

Sports.
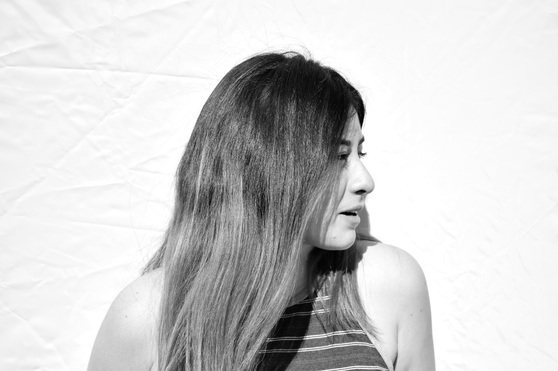
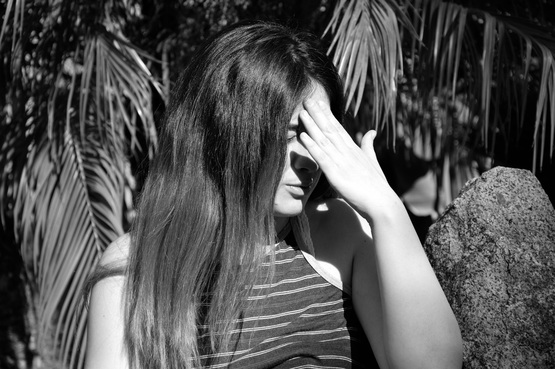
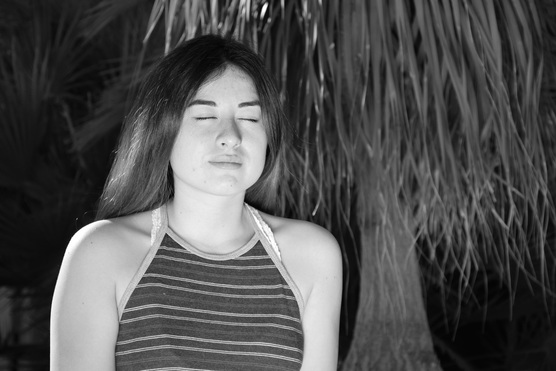
Mood Expression.
Composite.
8teen - Khalid
"Because I'm eighteen
And I still live with my parents
Yeah they're not like yours
Well yours are more understanding
I've never fell in love
I saved those feelings for you"
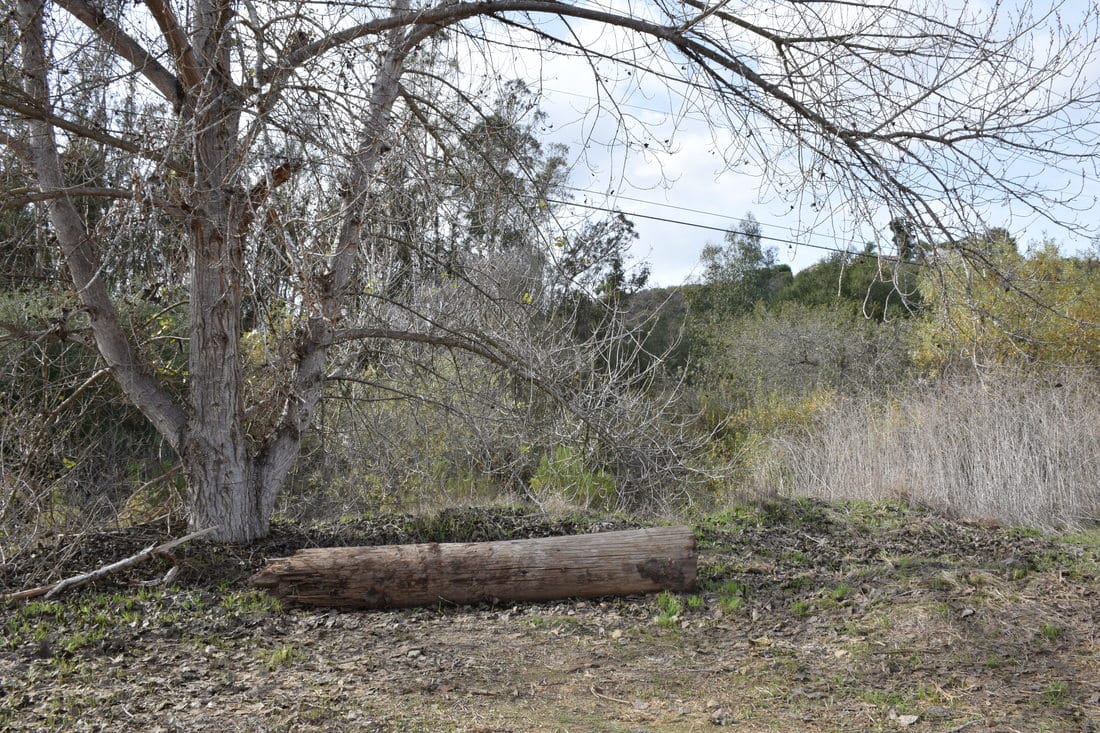
To create this in photoshop I used the clouds as my background, I changed the hue and saturation to make it a different color. Then I added the bridge, I used layer mask to erase the background from the bridge picture with the brush tool. Next I added the the flowers and did the same thing with the layer mask and duplicated the flower and put one in the front and back. I also added a picture of a tree, and I also a picture of my friend to sit at the end of the bridge. The song lyrics connect with the picture because she is reflecting on life.
"Because I'm eighteen
And I still live with my parents
Yeah they're not like yours
Well yours are more understanding
I've never fell in love
I saved those feelings for you"
To create this in photoshop I used the clouds as my background, I changed the hue and saturation to make it a different color. Then I added the bridge, I used layer mask to erase the background from the bridge picture with the brush tool. Next I added the the flowers and did the same thing with the layer mask and duplicated the flower and put one in the front and back. I also added a picture of a tree, and I also a picture of my friend to sit at the end of the bridge. The song lyrics connect with the picture because she is reflecting on life.
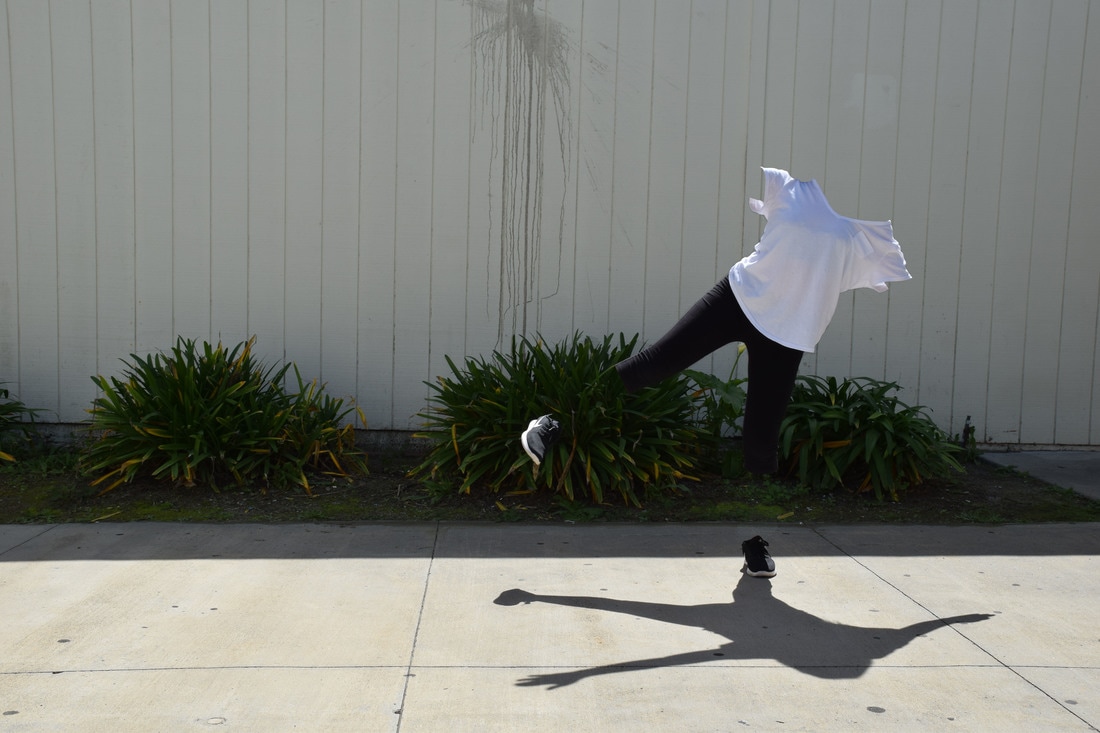
Flying.
Mandalas.
A mandala to me means having a small part of a photo and turning it into a different image. To create a mandala first have a circular template. Using the magic tool select a triangle form the template then drag it to your photo and place it on a desired spot. Place the photo and duplicate layer and rotate it to fit in the template and flip it. When the full circle is filled then duplicate layer and resize it to have a circle inside a circle. What I liked about this is that you can't really tell what the photo is. My favorite image was the one with the stop sign. What I struggled with was getting an image that was focused. If I were to do this again I would have a better focus on my images with different patterns.
Tessellations.
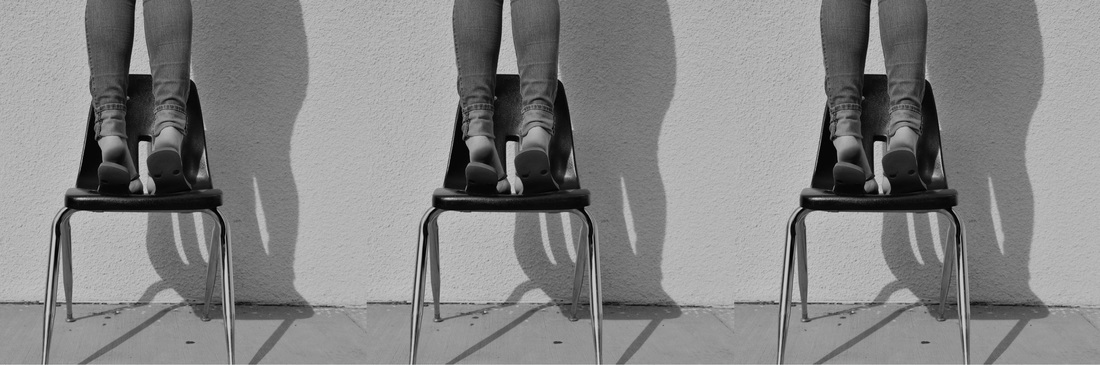
To me a tessellation means having a picture and having the same pictures flipped vertically and horizontally to have them form one picture making them look reflective. To create a tessellation you create a 8 by 8 file with a 300 resolution. Create guide lines to help you know where to place your image.Then open the picture you want and crop to a desired place, resize it with a 300 resolution. Bring the photo over to the file and and place your photo in the first square. Duplicate layer and flip horizontally, third photo will be flipped vertically, Last fourth photo will be flipped both horizontal and vertical. Do the same with the other photos. What I liked about this was how you can create many other things with just one photo. My favorite image was the one with the yellow flower. The thing I struggled was repeating the process again and again. If I were to do it again I would want different images to work with.
Portraiture.
ISO 200 , Aperture f/8 , Shutter Speed 1/250
ISO 200 , Aperture f/8 , Shutter Speed 1/750
ISO 200 , Aperture f/8 , Shutter Speed 1/250
ISO 200 , Aperture f/8 , Shutter Speed 1/500
ISO 200 , Aperture f/8 , Shutter Speed 1/350
ISO 200 , Aperture f/8 , Shutter Speed 1/350
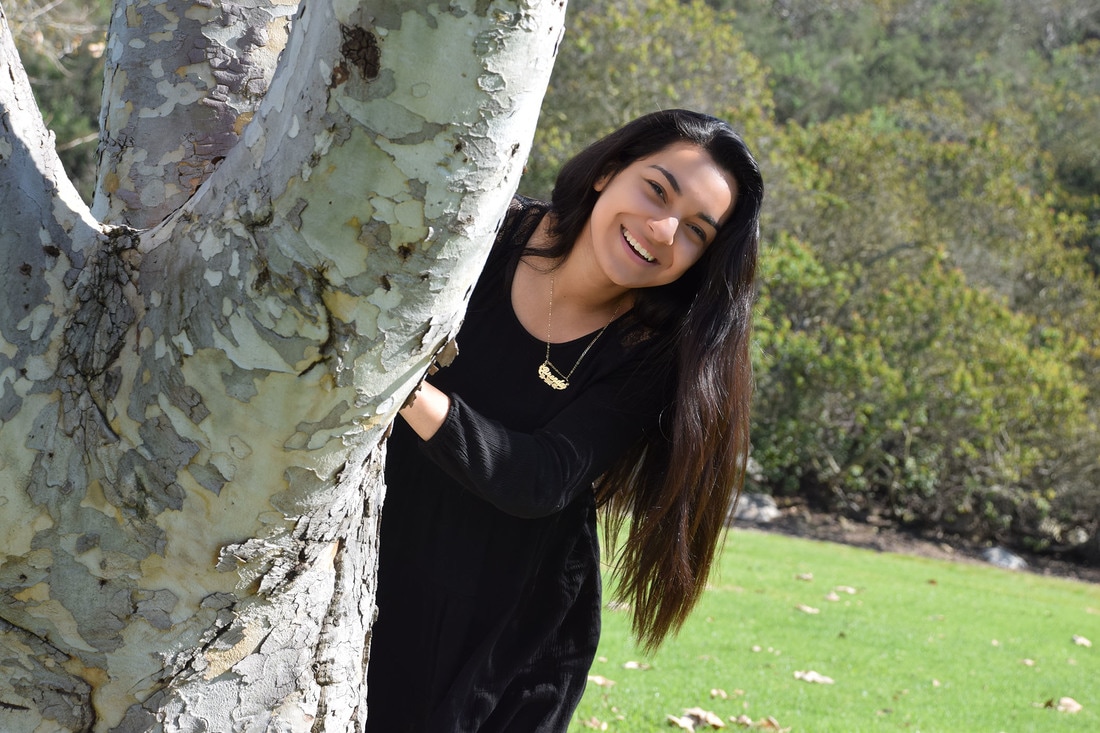
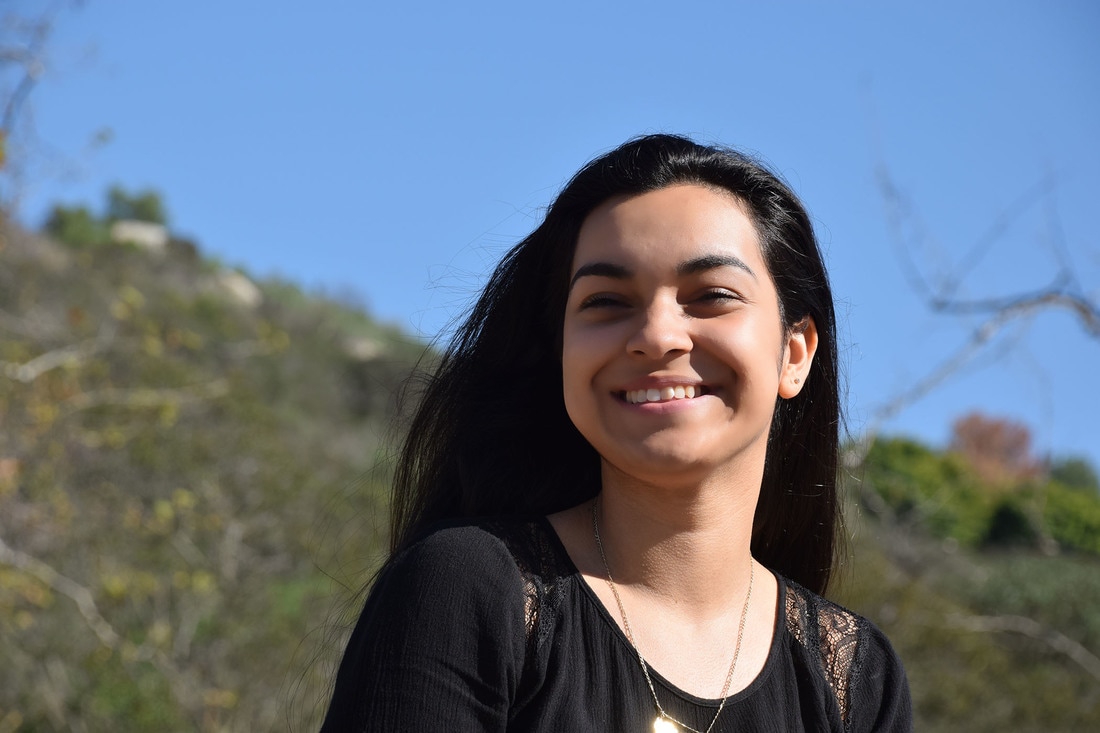
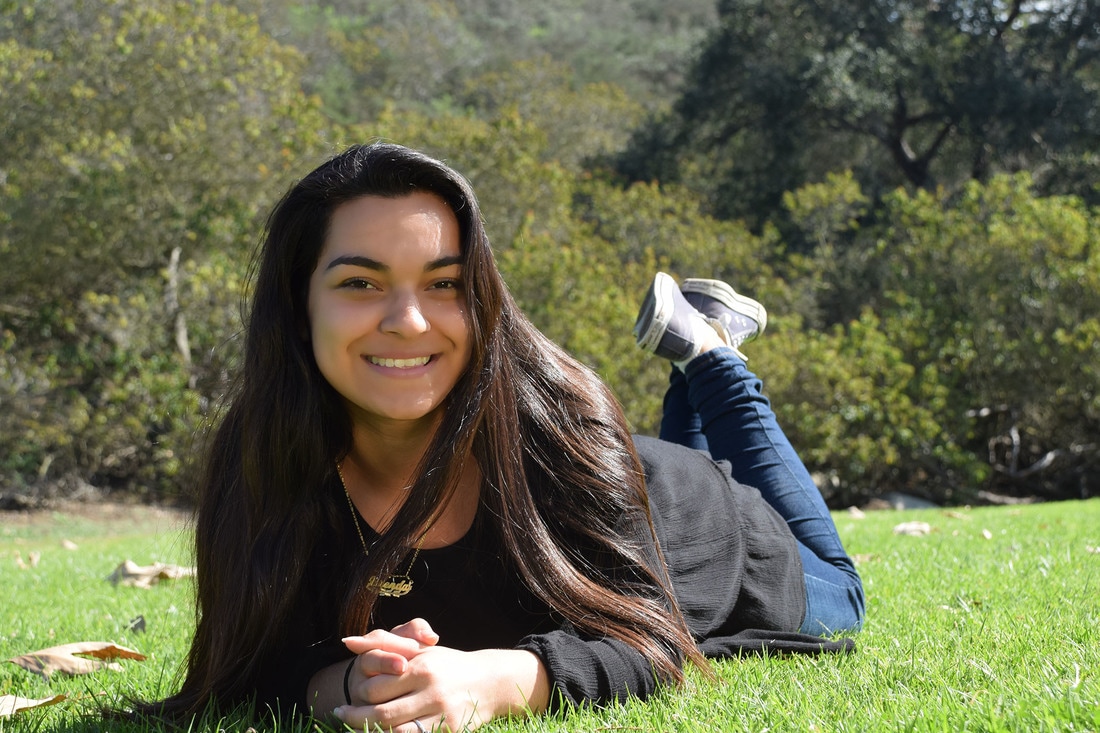
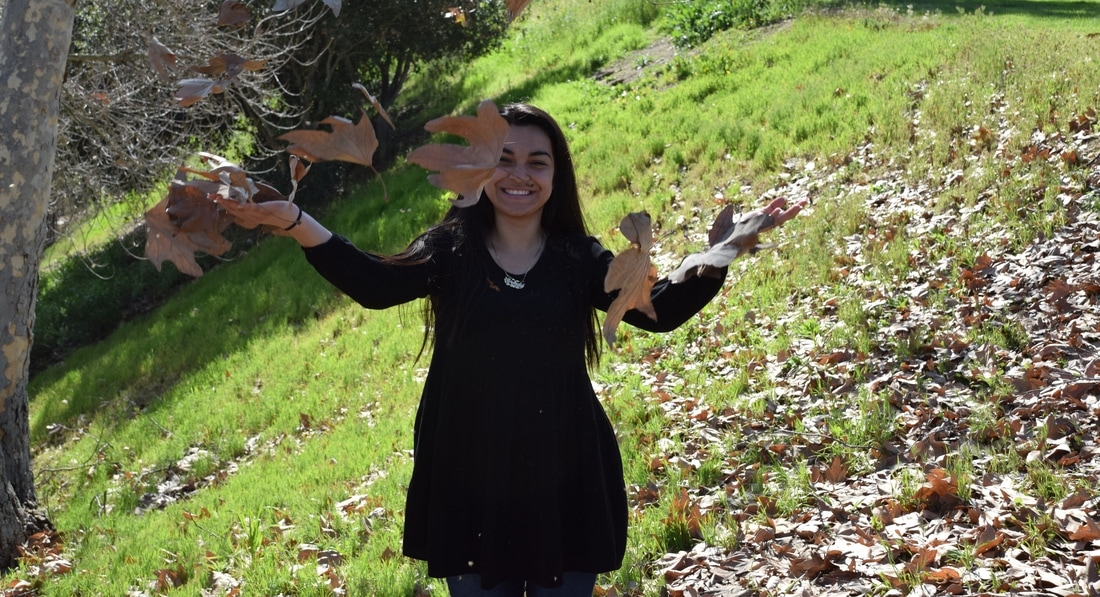
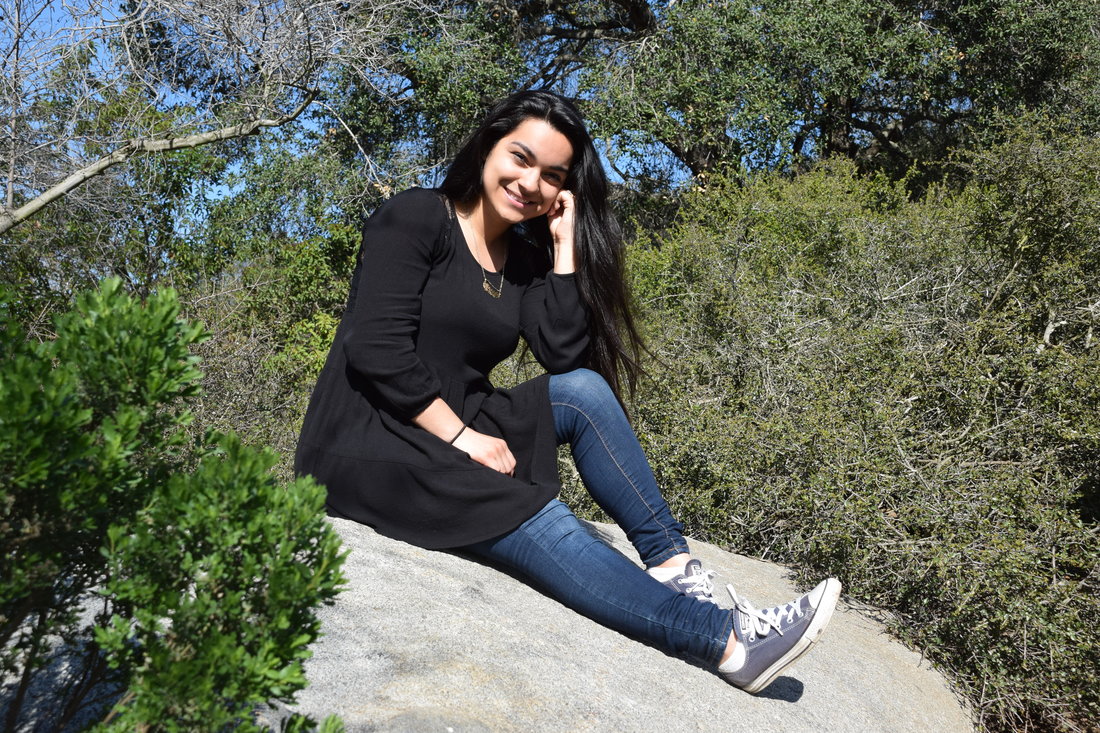
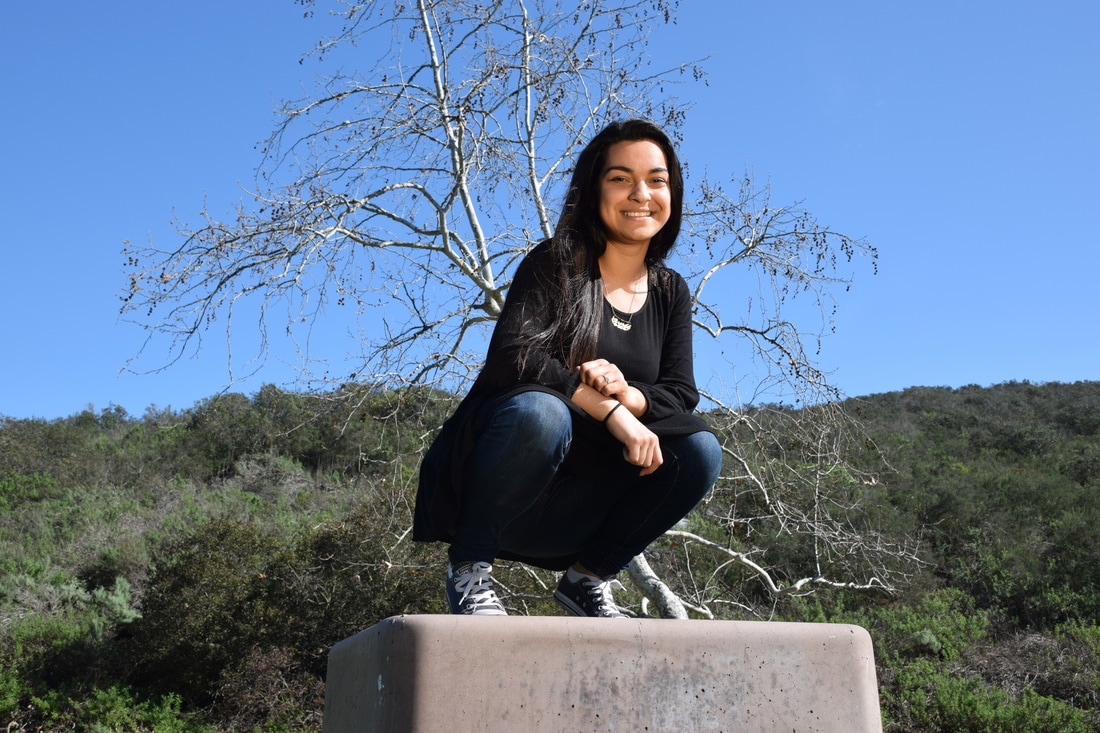
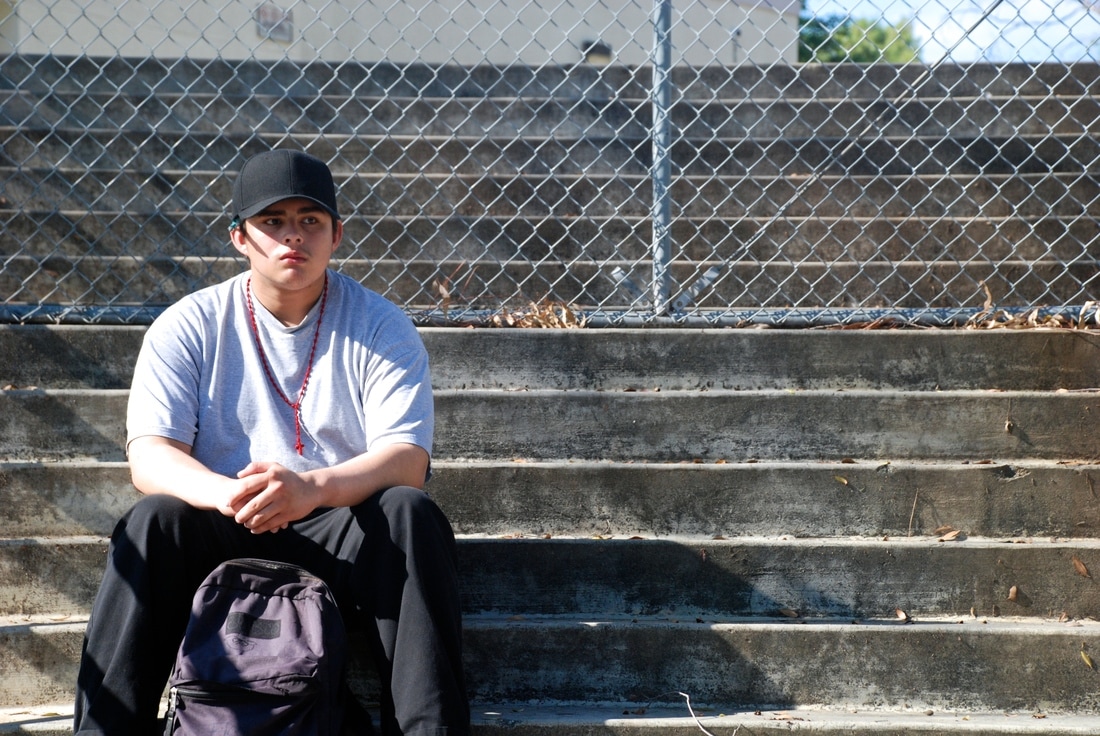
What I learned about portraiture from going to the duck pond is that the background should be nice and not a lot of things that will be distracting. What I used to decide the poses was that I followed the ones on the paper and some were just random. Using the poses on the paper was helpful since the model knew what to do. I used the reflector as a way to provide more light for the picture. The reflector was helpful since the model's face was brighter and not dark. This made the model look like she was facing the sun and made her face brighter. What I used to retouch some of the photographs was photoshop. Portrait photographers would work out of a studio or on location. Majority of photographers are self employed and their averaged salary is $40,280 annually. The average charge for taking someone's portrait photographs is $27 per hour.
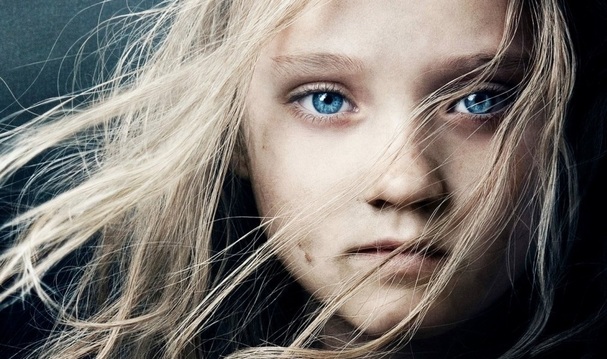
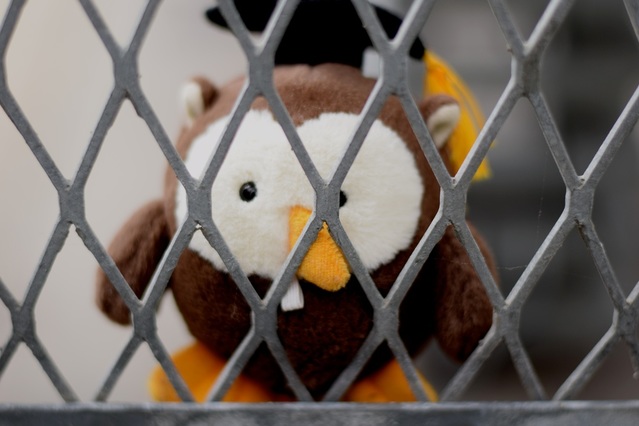
Education For All.
ISO 200 , Aperture f/8 , Shutter Speed 1/320
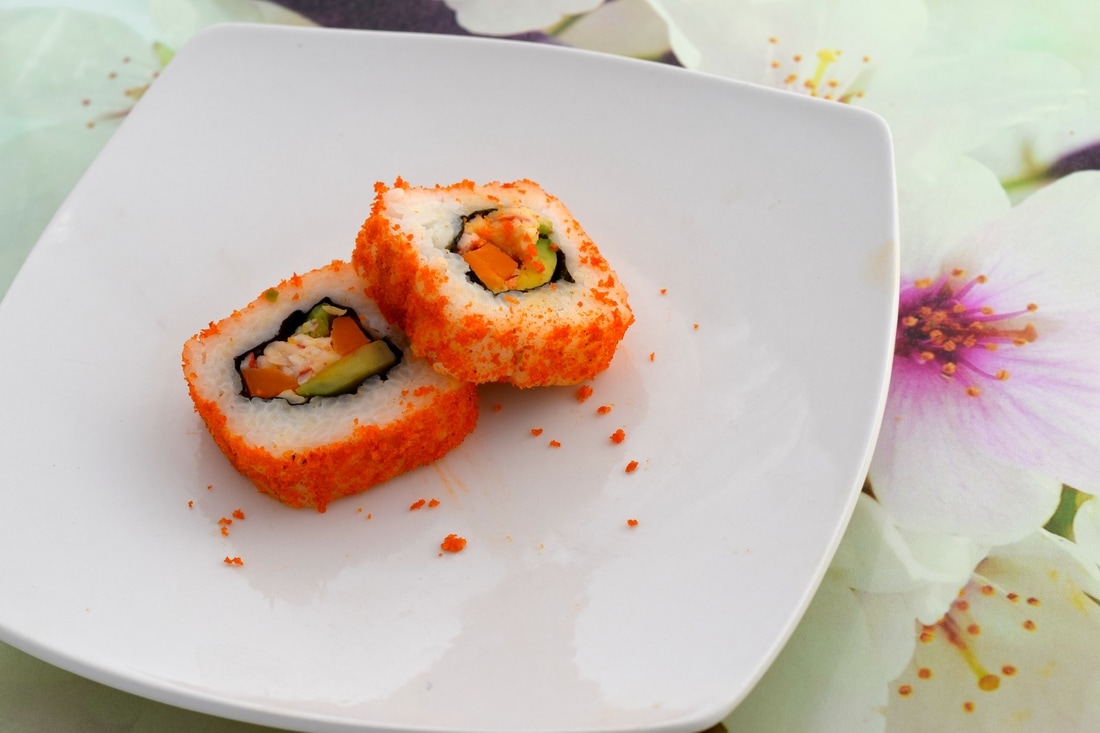
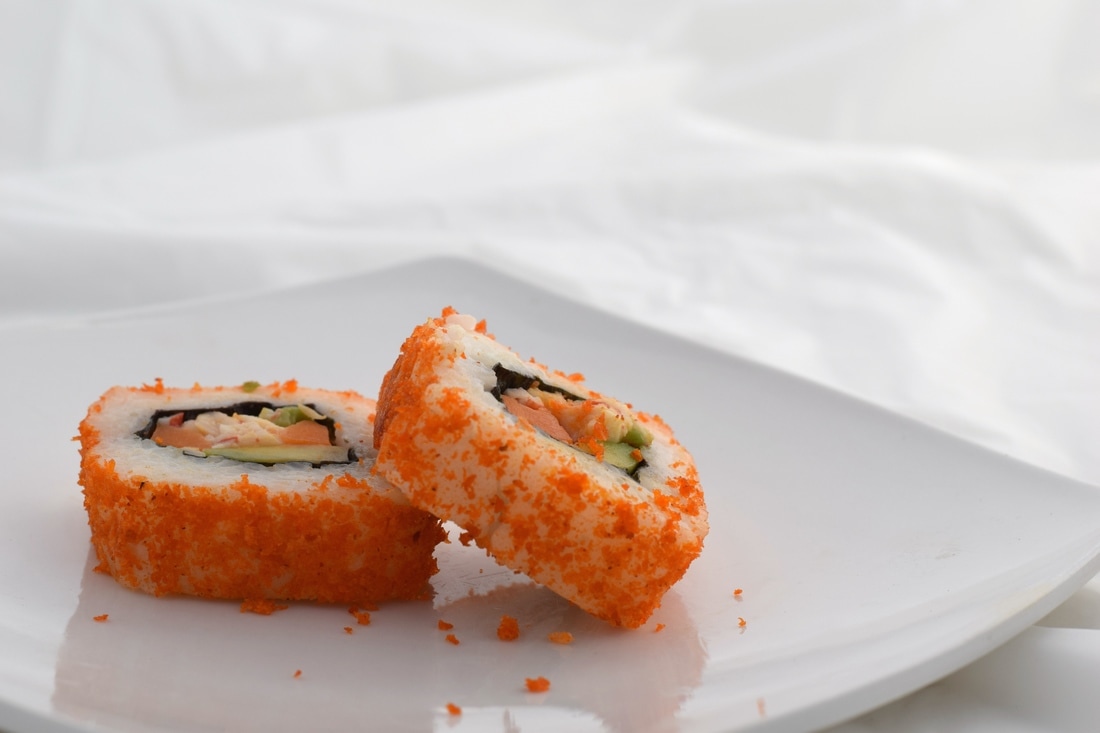
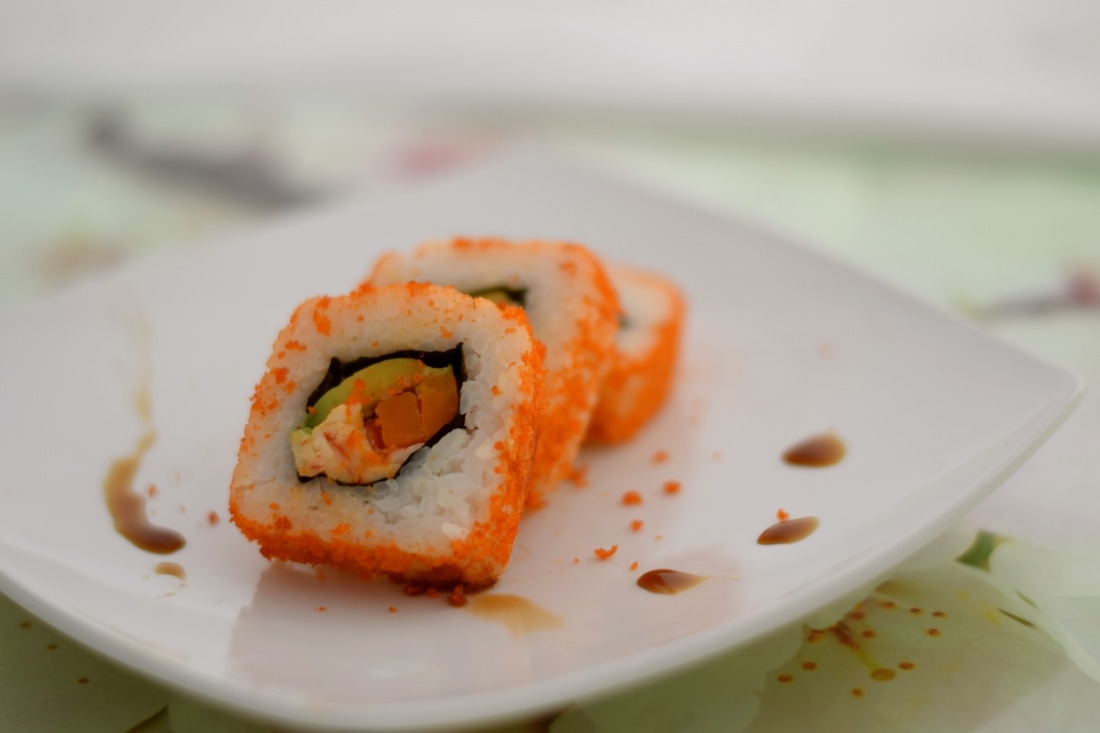
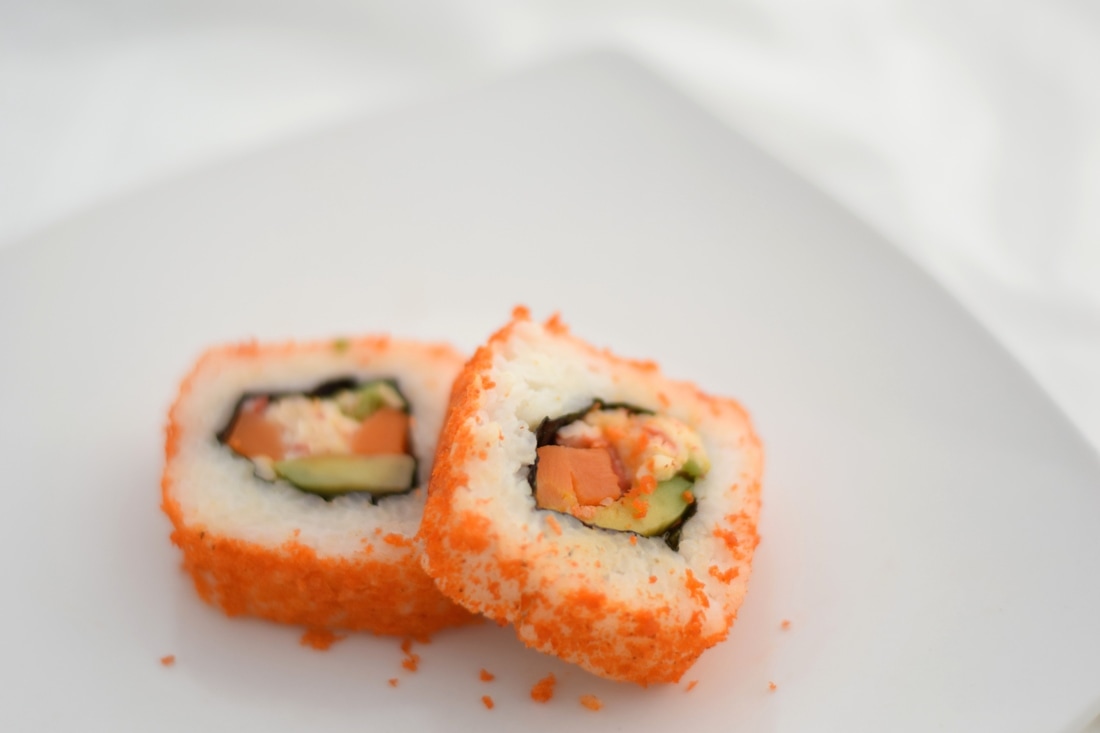
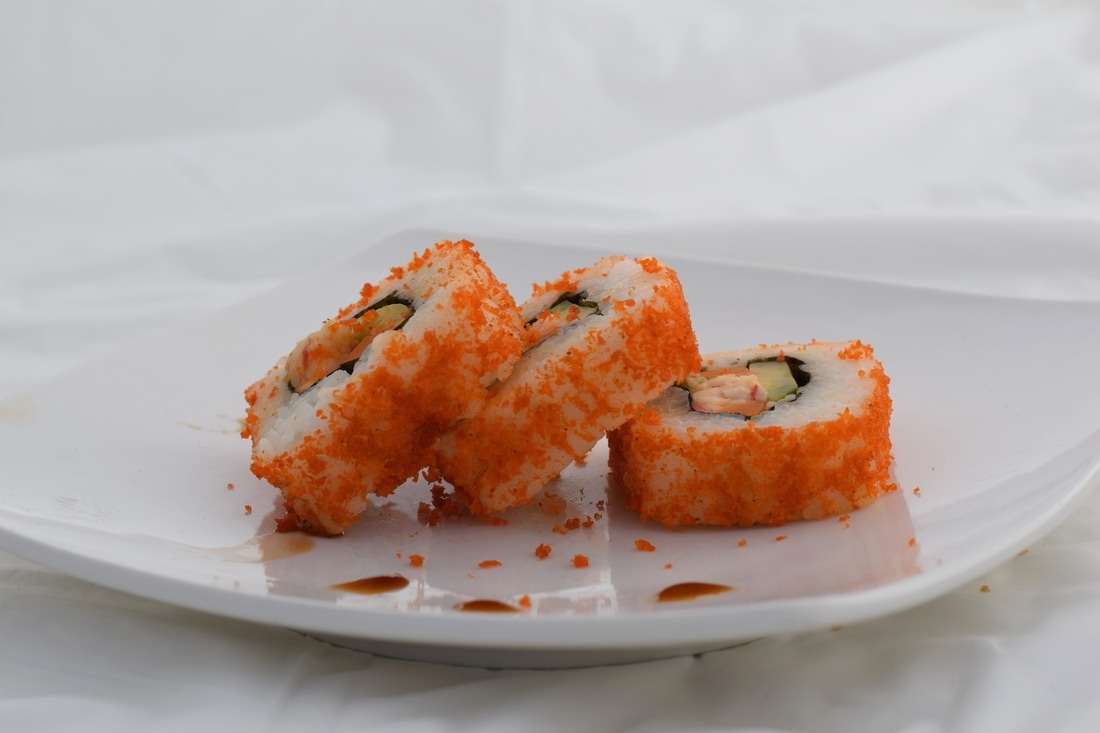
Food Photography.
Aperture f/1.8, ISO 200
Aperture f/8, ISO 200
Aperture f/1.8, ISO 200
Aperture f/1.8, ISO 200
Aperture f/1.8, ISO 200
Aperture f/8, ISO 200
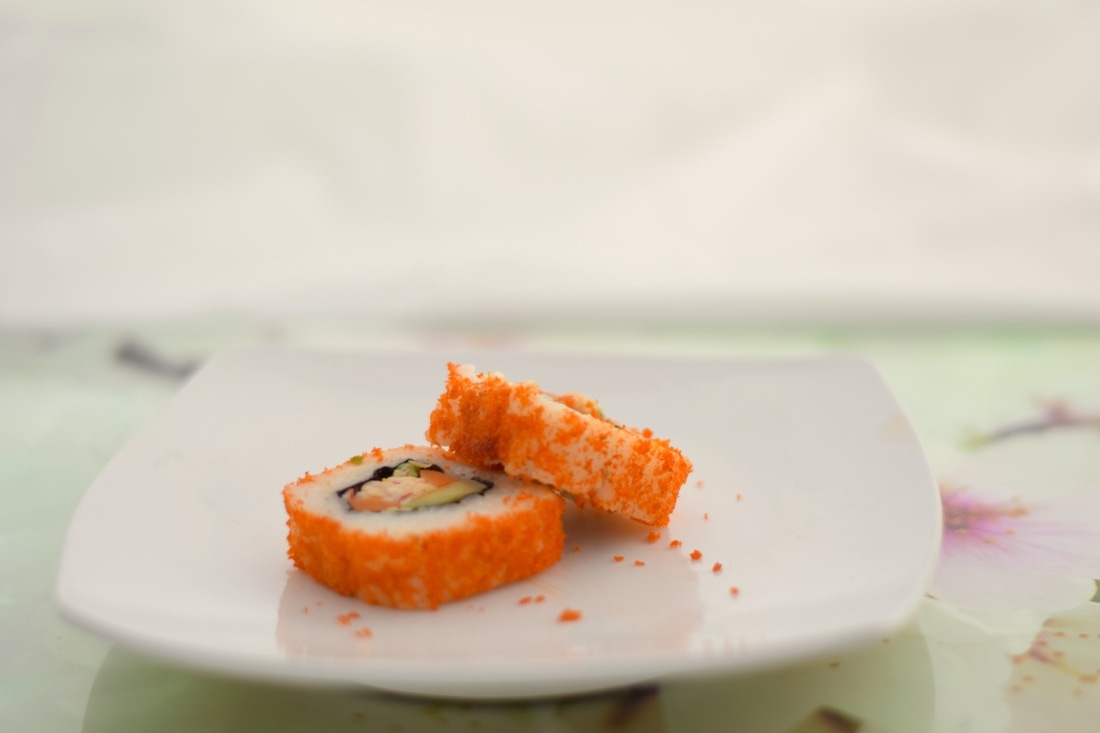
The food I brought in was sushi and the props I used was a plate and a glass frame that had some painted flowers. The five things I learned from food photography was that the lighting had to be really good, and that having a white background gives it a fresher look. You also have to place items in a specific way, and carefully control the environment. Also that the objects you use can be natural or handmade. To make my photographs look similar to the professional food photography was to have the same type of plate and to only use a little amount of sushi. Three things I learned about food photography was that you need to have props to make your picture better and that lighting is also important and to not have a busy background. Some careers or businesses that would use food photography are fast food restaurants and people on instagram. I think I was successful in having some color in my food photography, this would be something I would do again because I would have like to have more props.
Name Project.

Rainy Days.

ISO 640, Aperture f/8, Shutter Speed 1/350
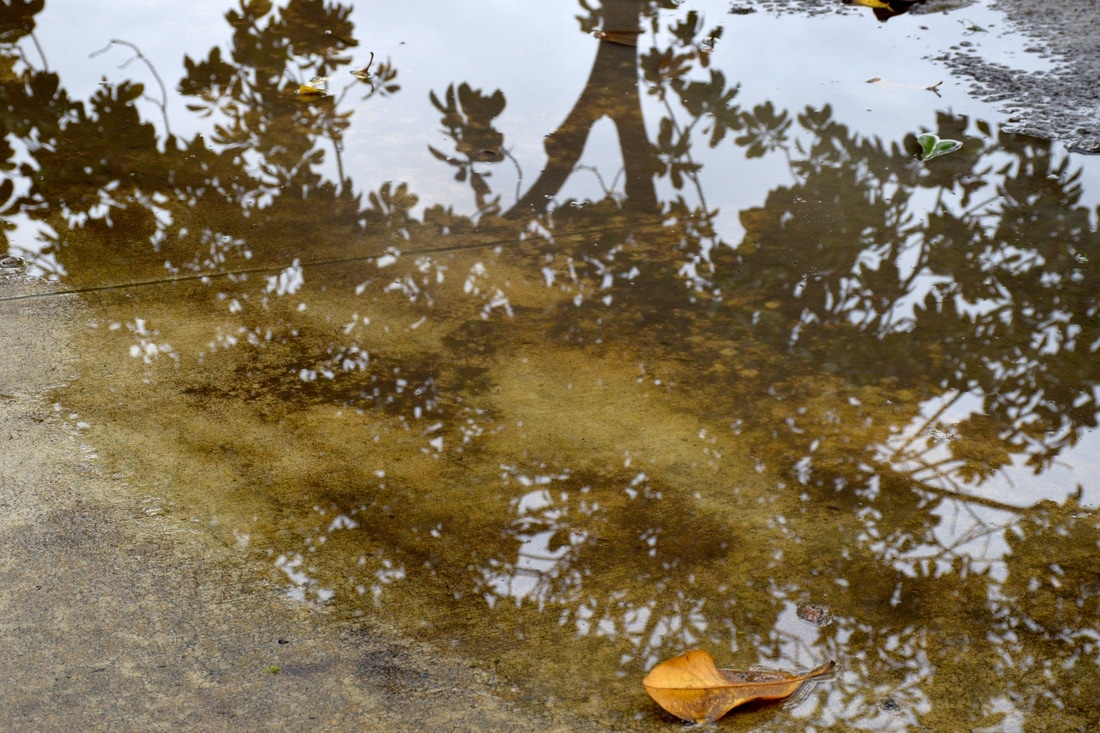
ISO 640, Aperture f/8, Shutter Speed 1/250
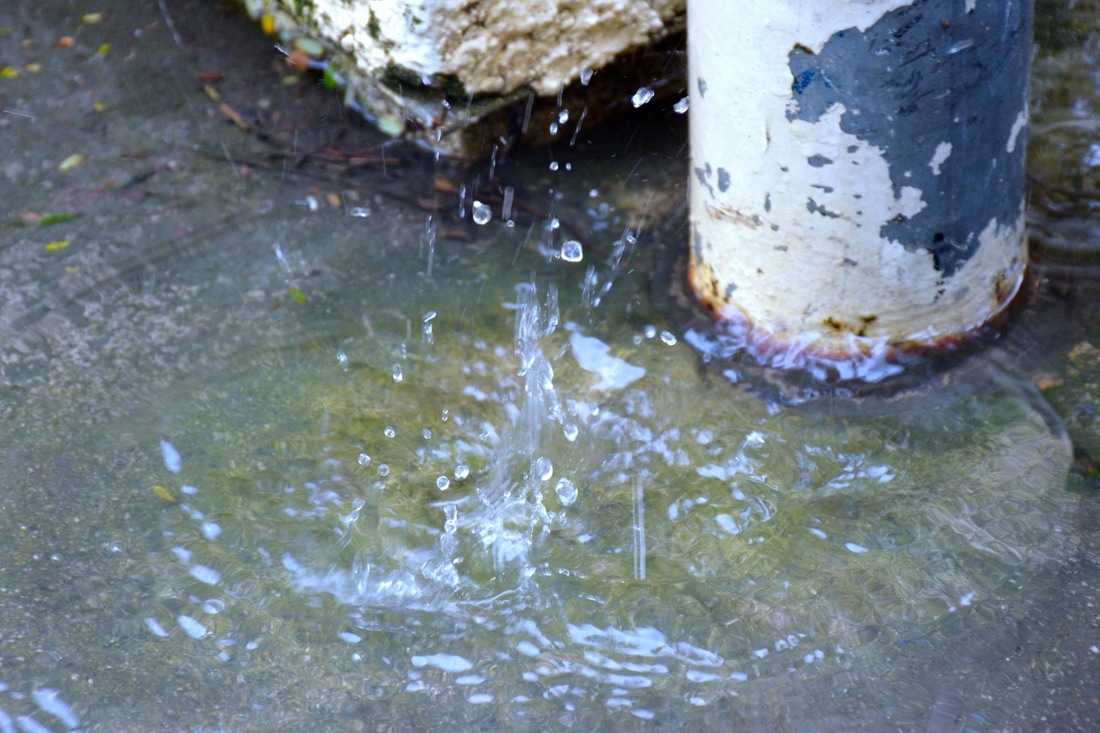
ISO 1000, Aperture f/8, Shutter Speed 1/180
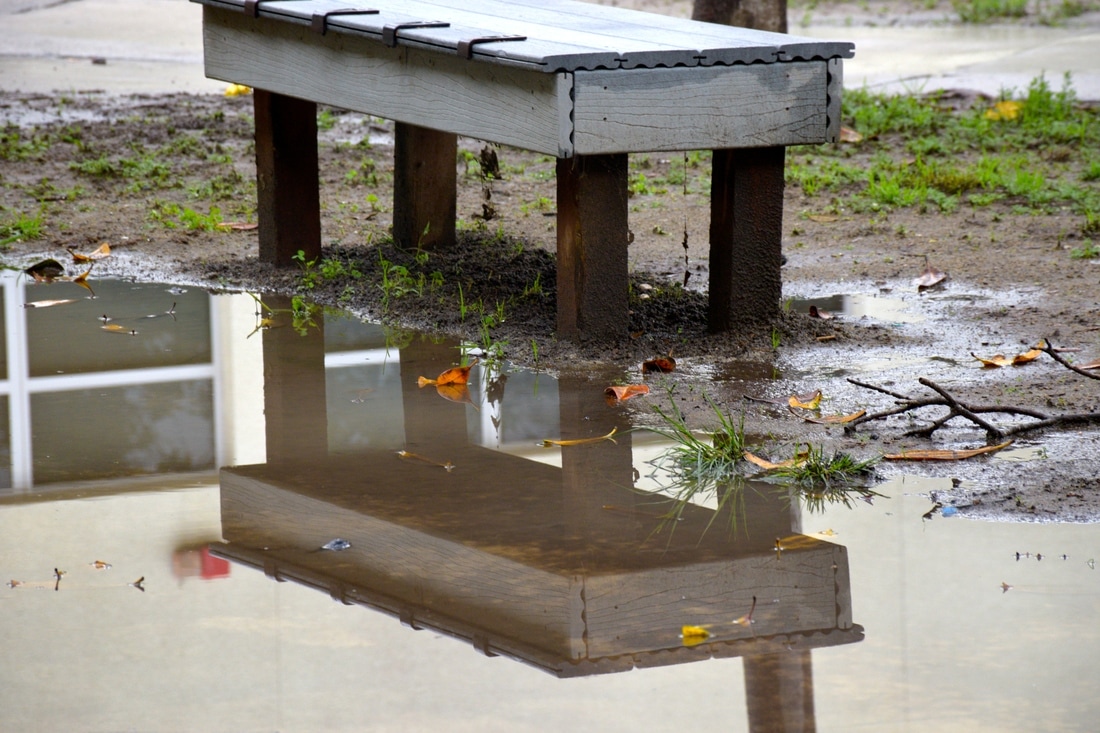
ISO 640, Aperture f/8, Shutter Speed 1/250
Layer Mask.
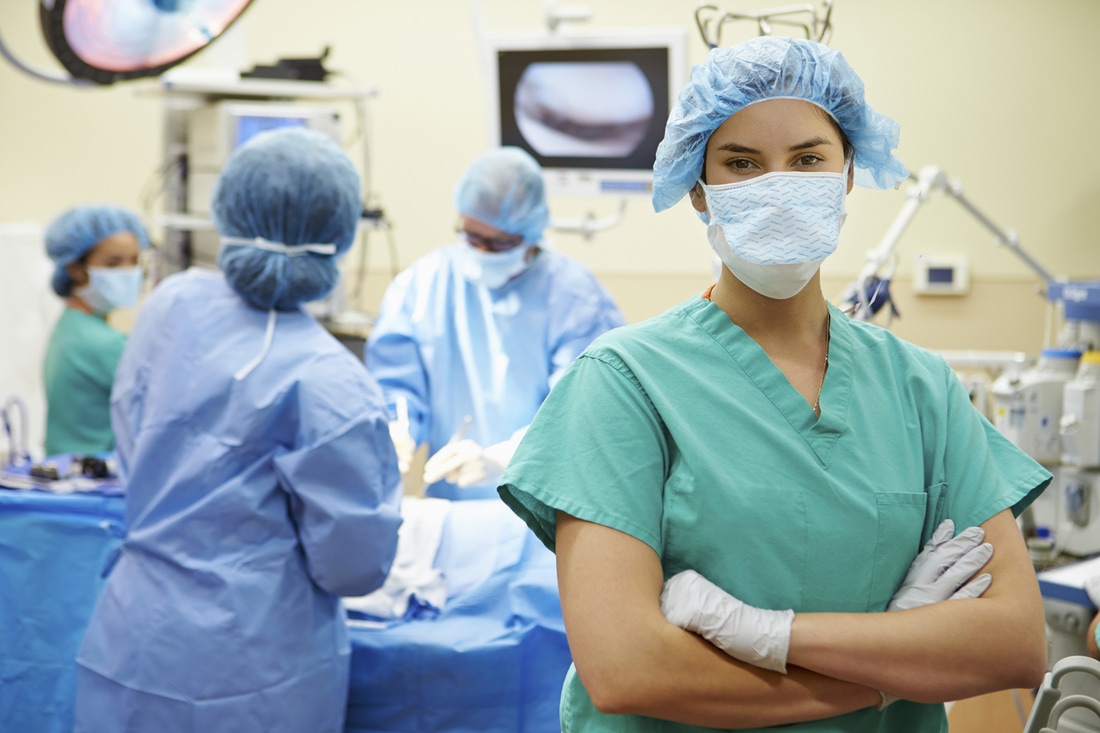
I chose the career of a surgical technologists. I became interested in this career because I recently did a project about it and want to pursue this career. My ideal day would be working at hospital helping surgeons during an operation. Helping the surgeon and interacting with patients would be really cool since you get to talk with different people from different backgrounds.
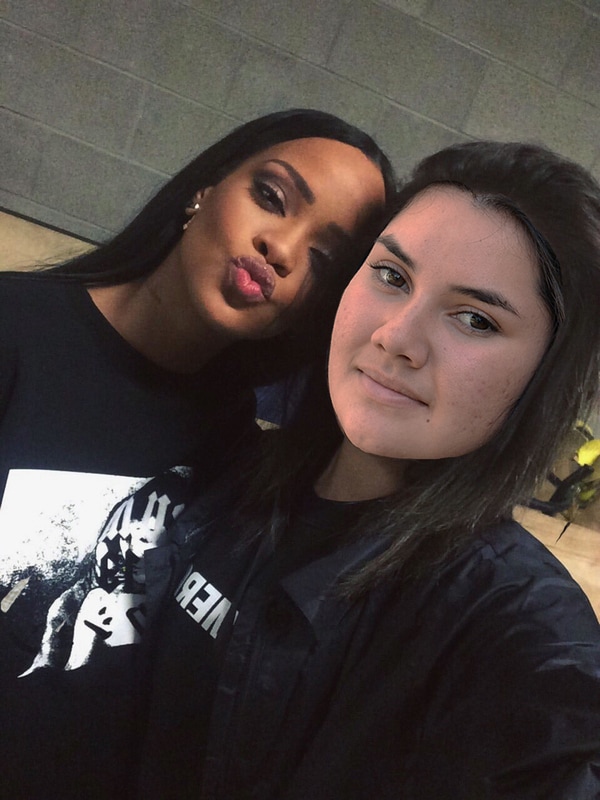
The celebrity I chose is Rihanna because I really like her music. The steps I used to create this on photoshop is first getting the images. Next I made sure the resolution was 300 and changed the image size. I used the lasso tool to get my face and placing it on the other picture. I then changed the opacity to match my face with the other face.
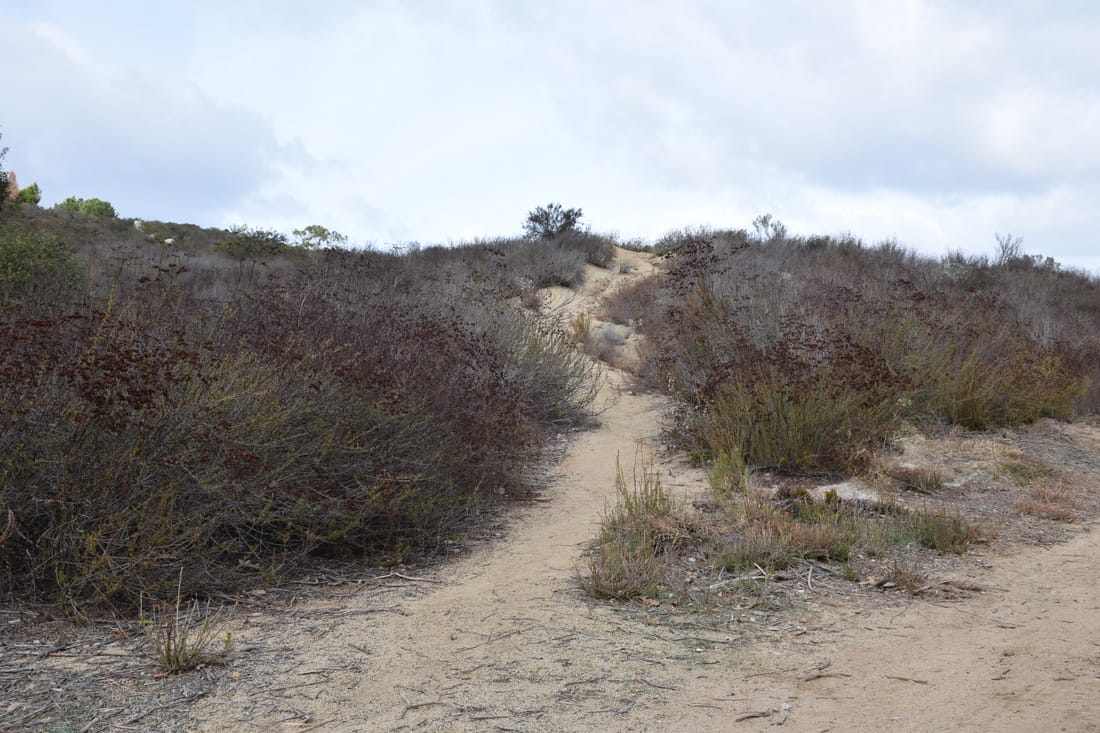
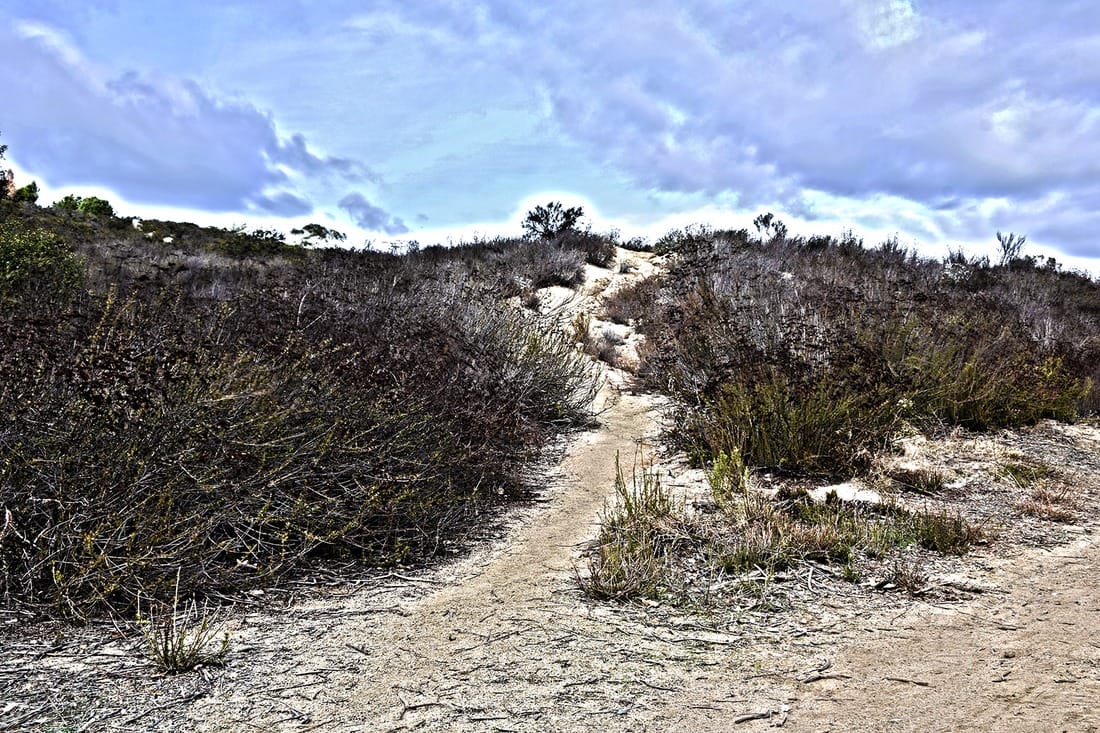
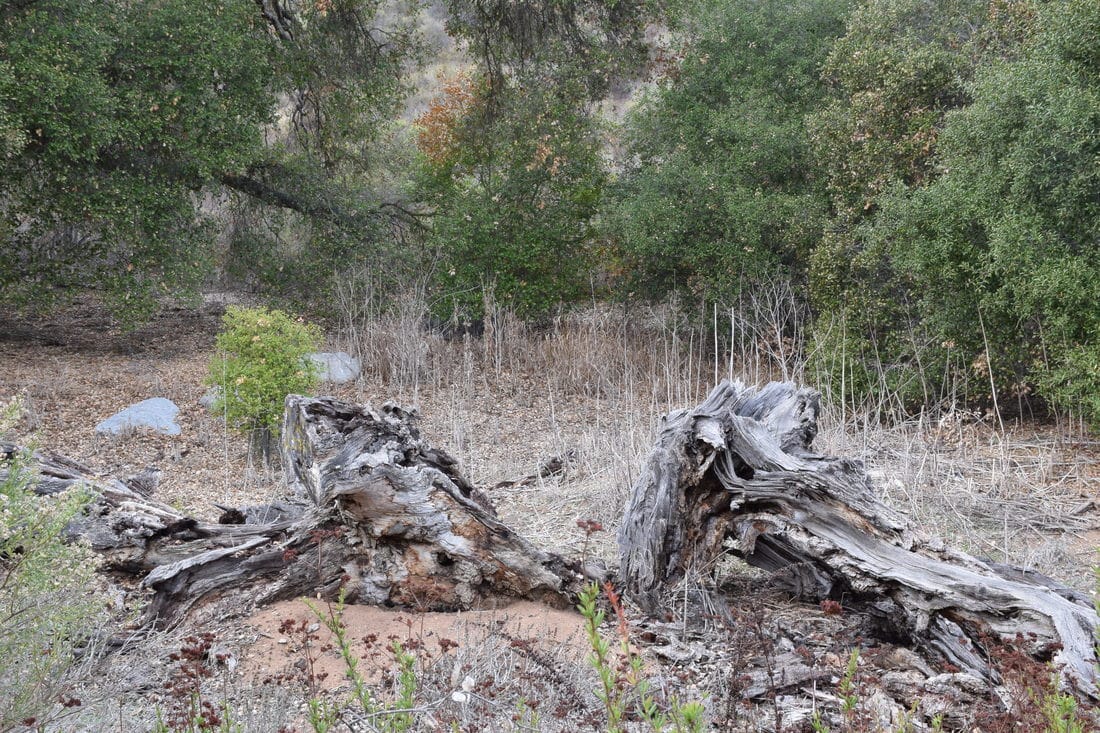
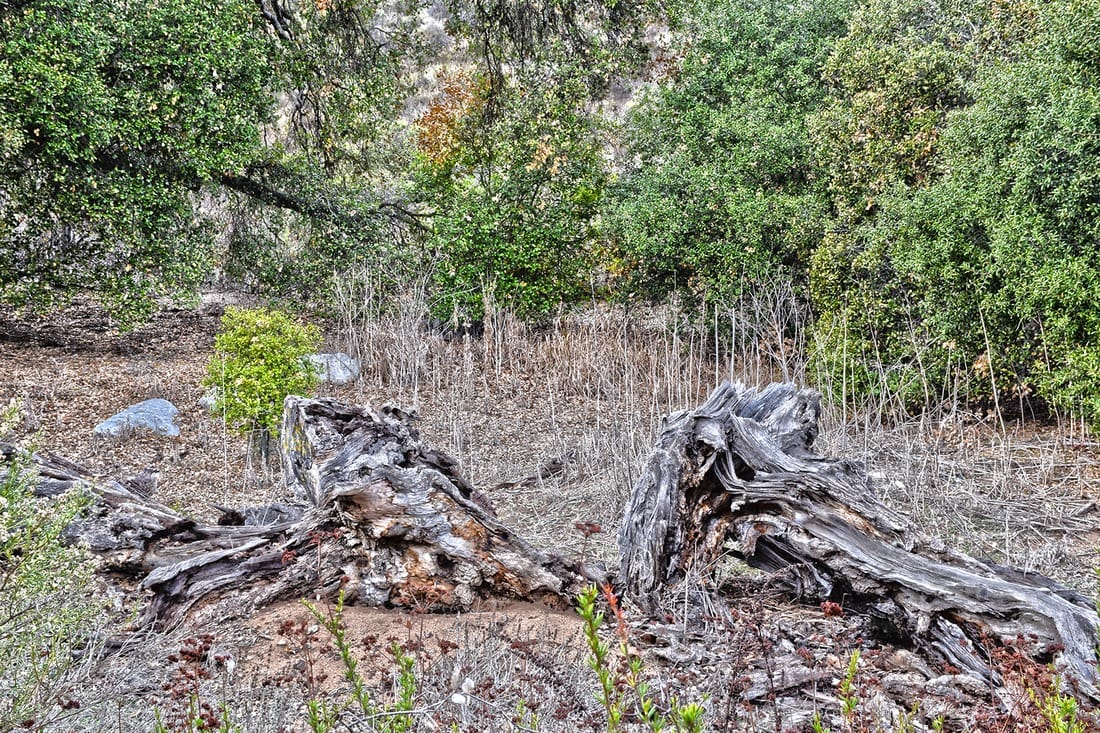
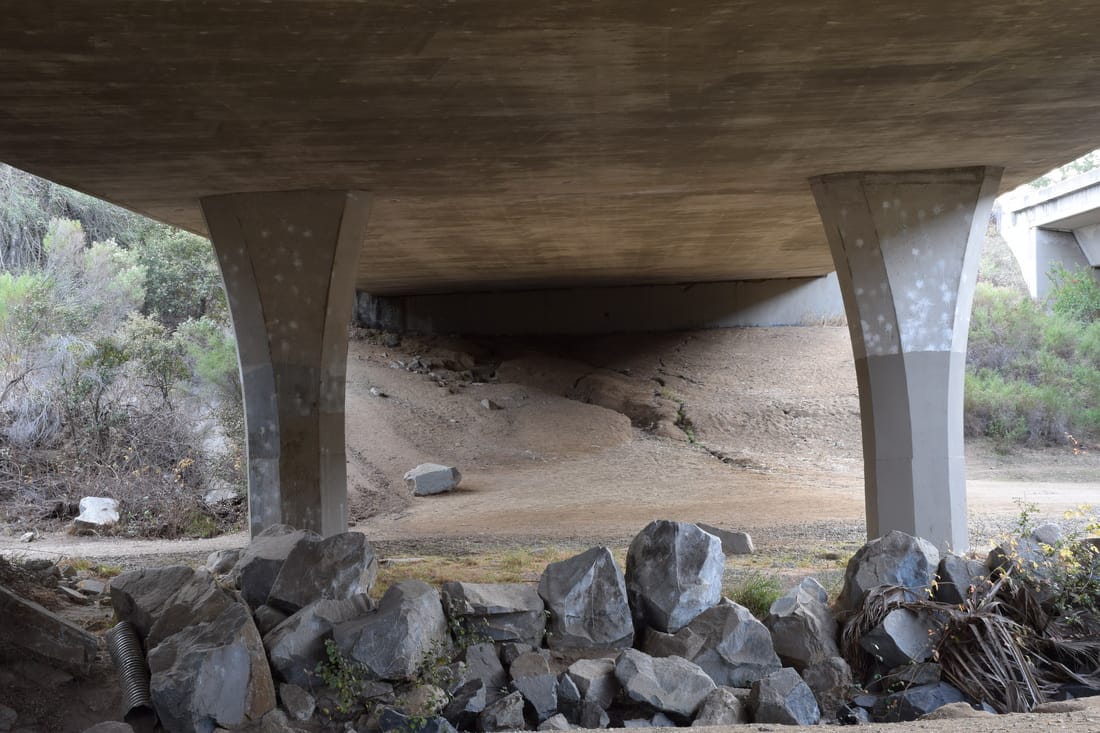
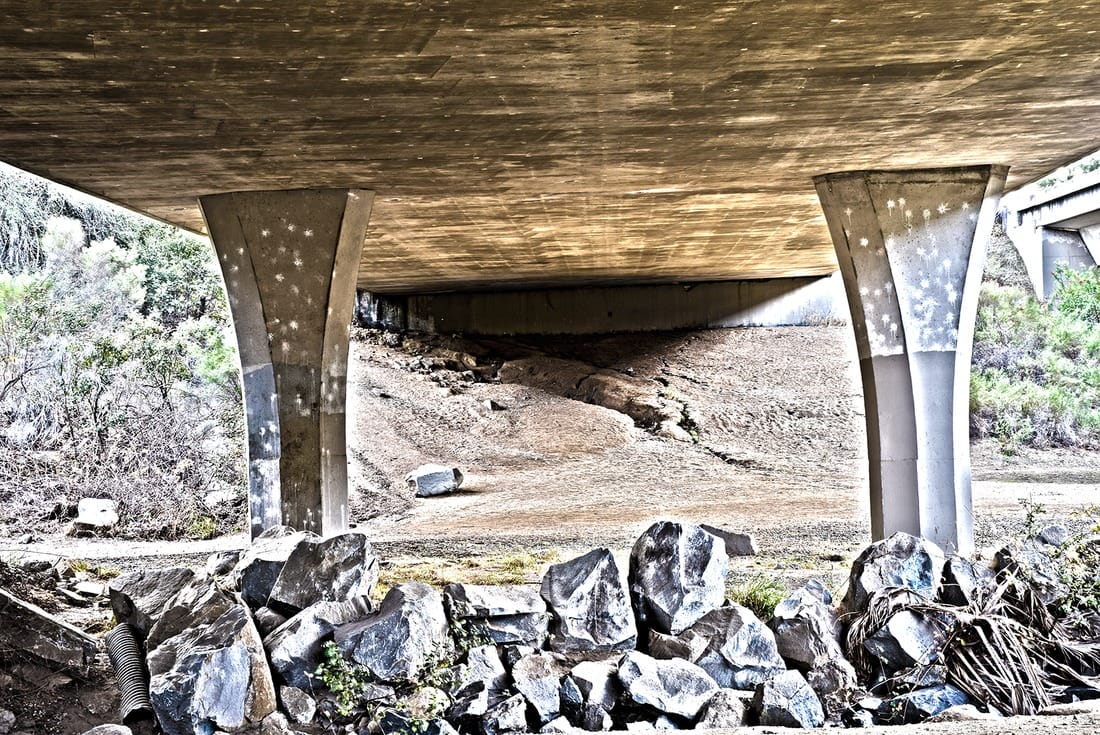
HDR Composition.
Crop.
Leading Line.
Symmetry.
Rule Of Thirds.

Frame.
Artist as a Mentor.
https://docs.google.com/presentation/d/1qO73ULLO0v2SstBVgqabAO1JAondgWaPZpyK8D4tkPY/edit?usp=sharing
|
|
|
|
Super Moon.

Blood Moon Lunar Eclipse, September 27, 2015. Left image: 70-300mm lens @ 270mm, ISO 1000, aperture f/5.3, shutter speed 1.3 secs. Right image: 70-300mm lens @ 300mm, ISO 800, aperture f/13, shutter speed 1/1250 sec.
To photograph the moon:
1. Use a tripod! A flat surface will only allow you to shoot straight, and shooting the moon means that you'll be shooting up and constantly re-adjusting the tripod as the moon moves throughout the night.
2. Use a shutter release cord, remote or the camera's self timer if you don't have one, so that you don't move the camera when pressing the shutter release during a long exposure.
3. Use a zoom lens and zoom in as much as you can to the moon. It's okay if it's not a super fancy lens, this was shot using a 15 year old $100 lens. Focus in on the craters and details on the moon.
4. ISO 1250- 1600, so that you can use as fast a shutter speed as you can without losing detail-the longer the shutter speed, the more chances you have the camera will shake even slightly in the wind, resulting in an out of focus photograph.
5. Aperture priority of f/5.6 since you are not worried about capturing any details other then the moon.
6. Bracket your exposure, meaning over expose and underexpose the photograph from what the camera is telling you. Generally the camera will overexpose the moon, so you'll get nothing but a white blob in the sky. Use the exposure compensation button (the +/- button below the shutter release) and change the exposure to -0.5, then -1.0, then -1.5 and so on, until you start seeing detail in the moon. You may go as far as -5.0 exposure compensation to get what you need.
7. Take a fair amount of photos and keep refocusing as the night progresses. The photographs may look focused on the camera's display, but you won't really see if they're completely in focus until you upload them onto your computer screen.
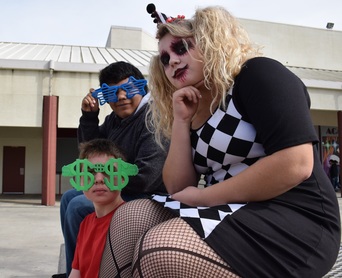
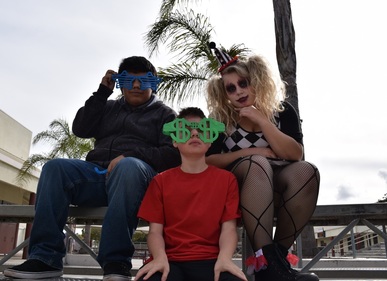
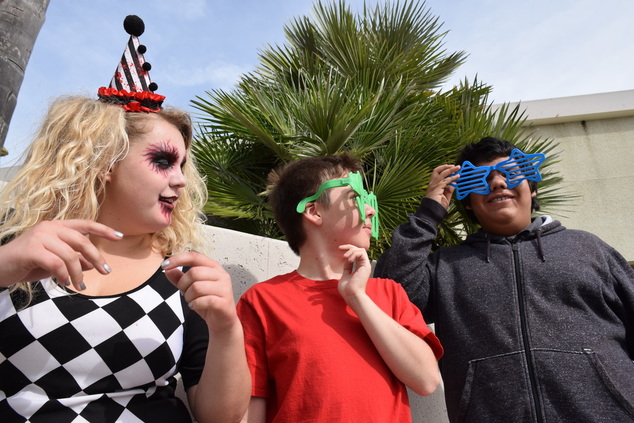
Halloween.
ISO 400, Aperture f/8, Shutter Speed 1/800
|
ISO 400, Aperture f/8, Shutter Speed 1/1,250
|
ISO 400, Aperture f/8, Shutter Speed 1/800
Principles of Art.
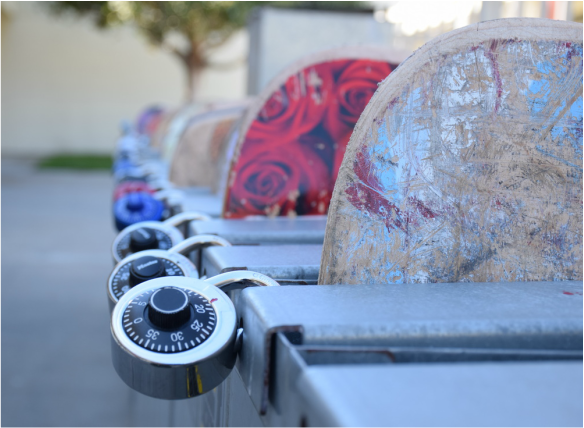
Balance
Aperture f/8, ISO 400, Shutter Speed 1/180
This picture shows skateboards that are locked. The element is in this picture because it is asymmetrical. This photo was a success because the locks are aligned and can be symmetrical.
Proportion
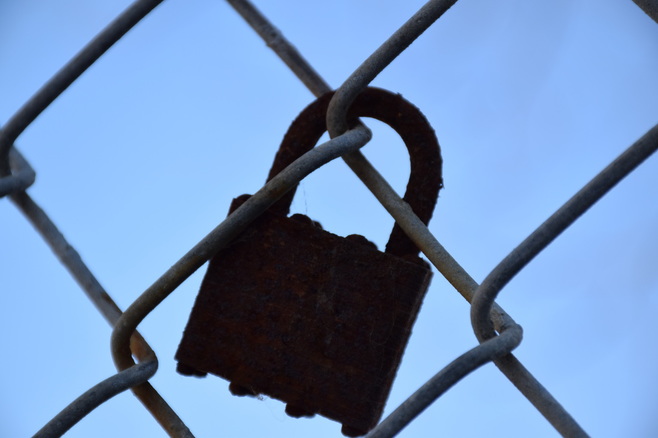
Aperture f/9.5, ISO 400, Shutter Speed 1/500
This photo is of a really old lock that was on the fence. This shows the element of proportion because the lock looks bigger than it actually is. This picture was a success because it shows size.
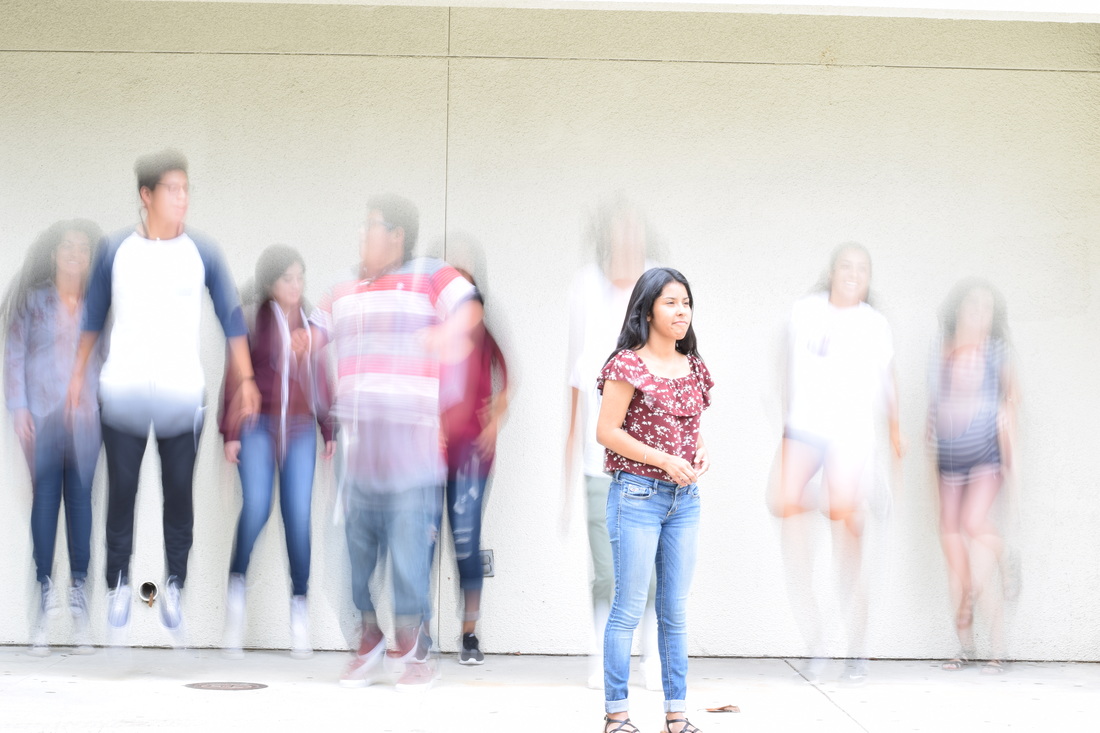
Rhythm
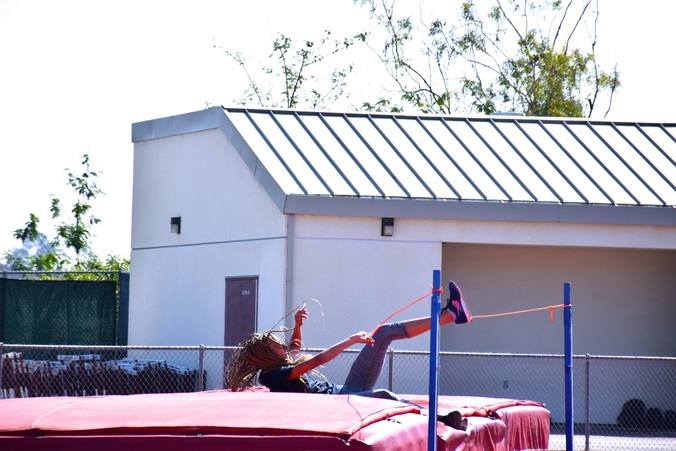
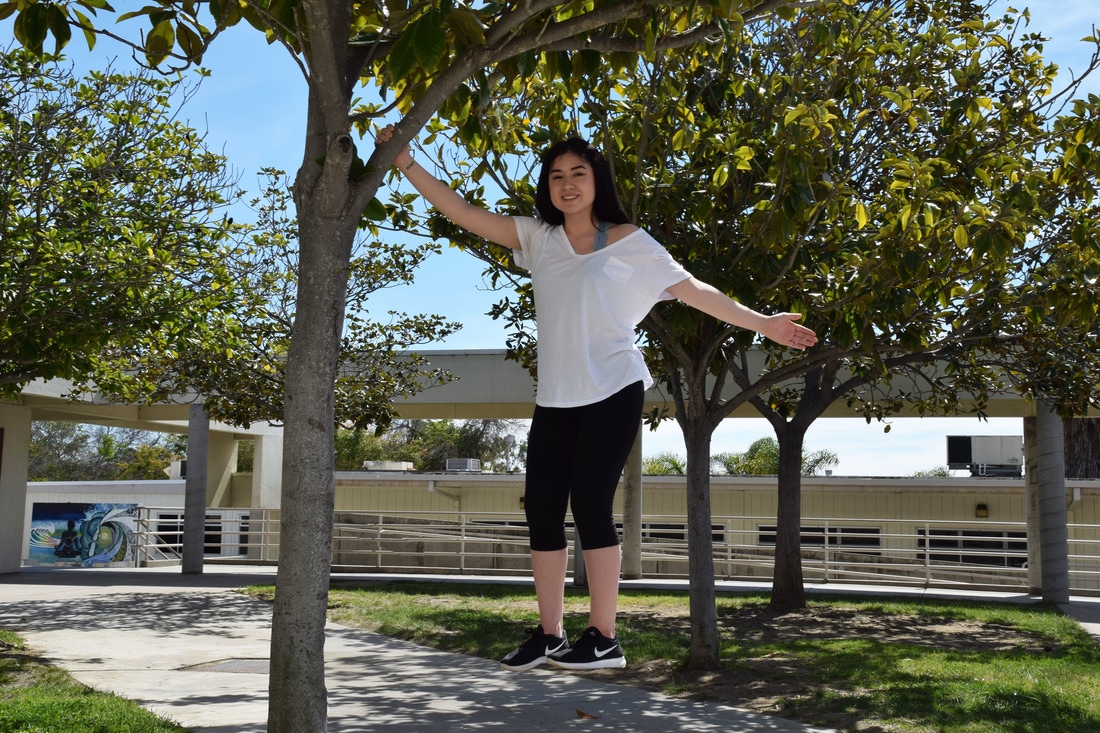
Aperture f/8, ISO 400, Shutter Speed 1/1500
This picture is of someone trying to jump over the rope. This shows rhythm because it demonstrates movement. This photo was a success because when you look at her hair and feet you can notice the rhythm.
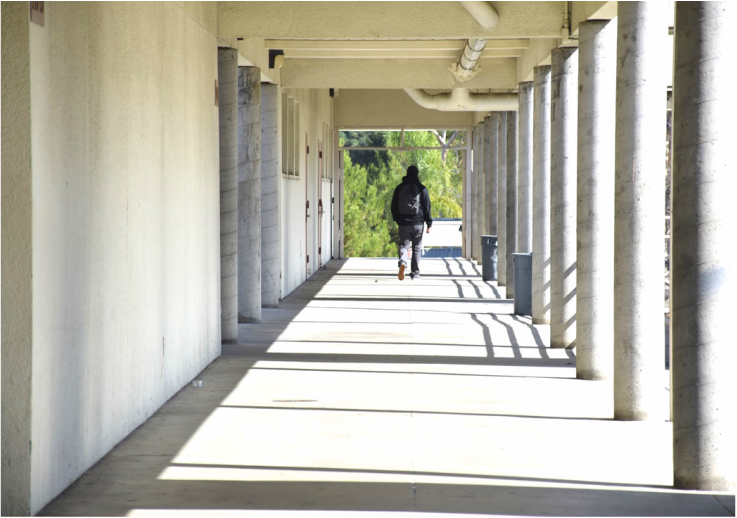
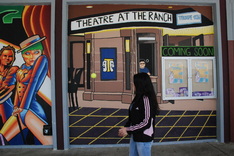
Emphasis
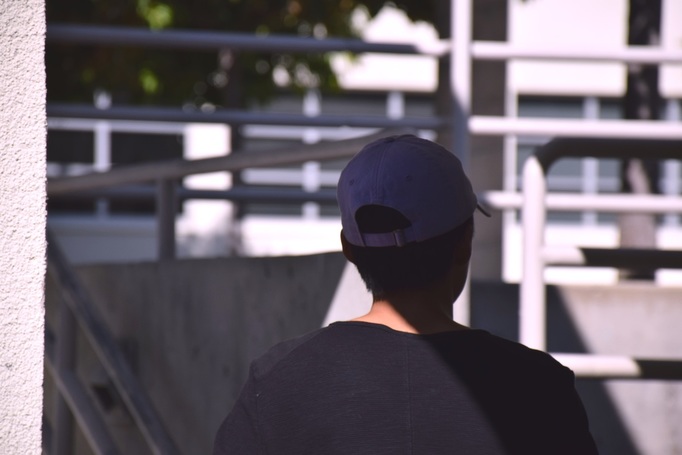
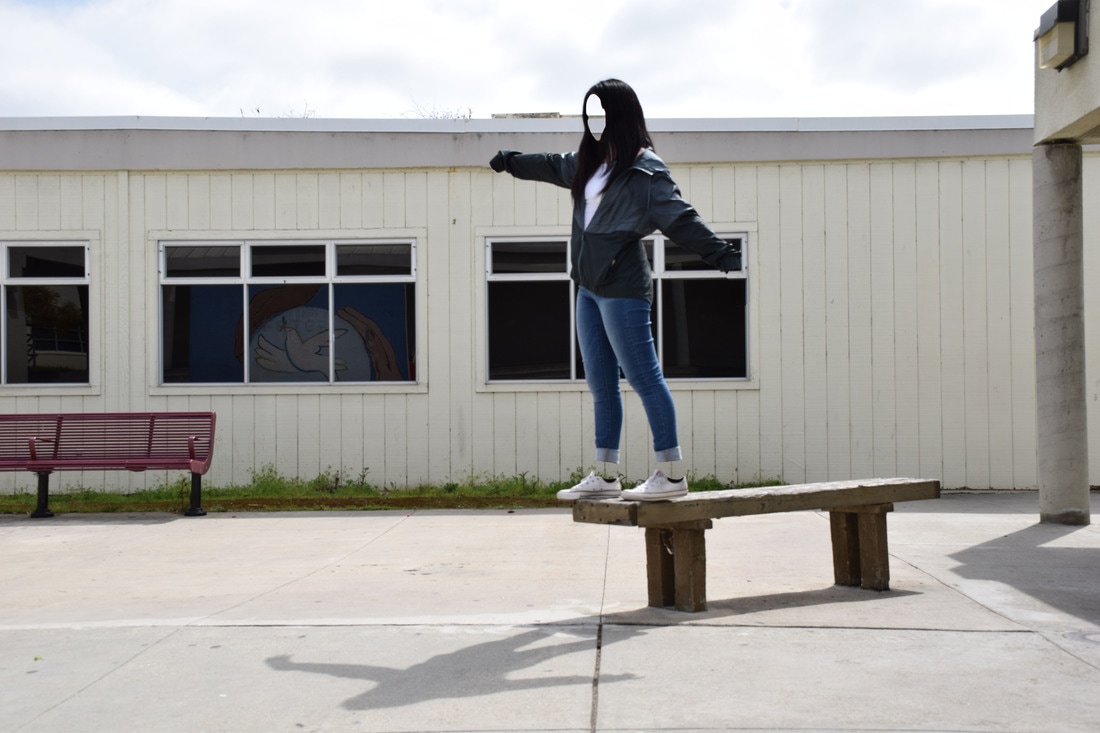
Aperture f/8, ISO 400, Shutter Speed 1/2000
This is a picture of a guy walking down the hallway. This picture shows emphasis because we don't know anything about him and it makes us wonder what his lit is like. This picture was a success because the guy is the main focus.
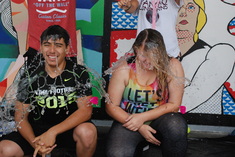
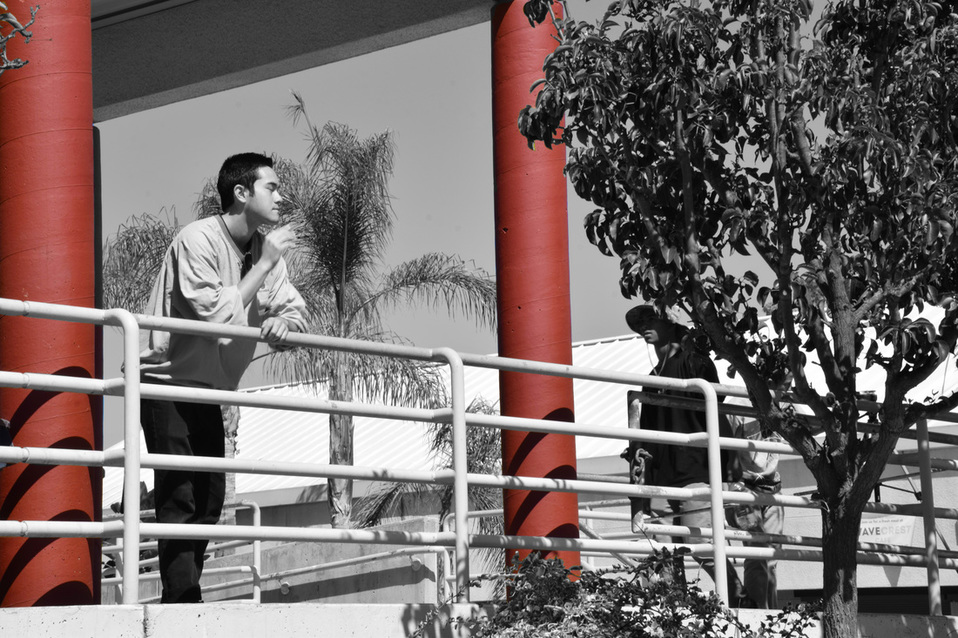
Harmony

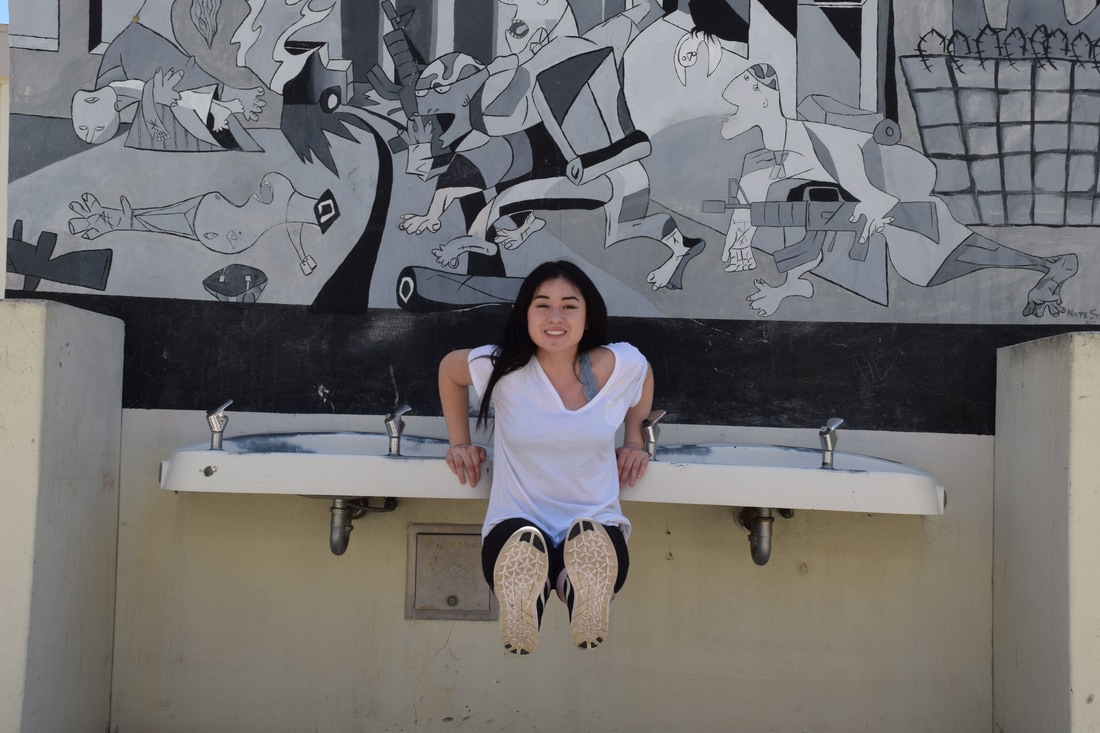
Aperture f/8, ISO 400, Shutter Speed 1/500
This picture is of Valerie that was sitting on railing. This picture shows harmony because there are different elements of composition. This photo was a success because the sun light gives it a nice color.
Variety
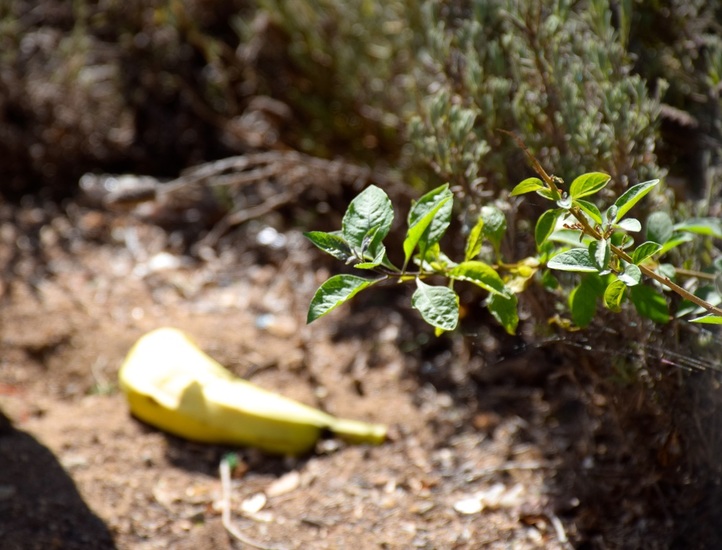
Aperture f/9.5, ISO 400, Shutter Speed 1/750
This is a picture of a banana that was on the ground. This picture represents variety because it is not only a picture of the branch but also of the banana. This picture was a success because it was a random place to put a banana.
Unity
Aperture f/8, ISO 400, Shutter Speed 1/350
This is a picture of a tree. This picture shows unity by using the elements of harmony an variety. This picture was a success because the lighting gives it harmony and acorn gives it variety.
Elements of Art.
Line

Aperture f/16, ISO 400, Shutter Speed 1/250
This photo is of the hallway's ceiling on campus. This photograph shows line because there are lines that vary in width and length. Some the lines are straight and others are diagonal. This photo was a success because the first thing you will think when you see this is lines.
Color
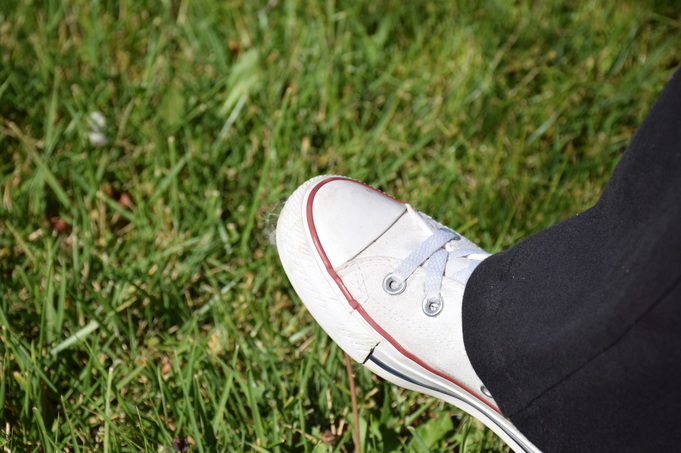
Aperture f/8, ISO 400, Shutter Speed 1/2000
This picture is of a person's shoe that is about to step on the grass. This photo represents color because the two main colors I see are green and white. It was a success because the color green is the only color in the background
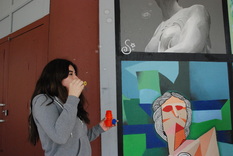
Shape
Aperture f/8, ISO 400, Shutter Speed 1/1000
The photo is of a student that is walking down the hallway. This photo shows shape because the hallway forms the shape of a square that is getting smaller as it goes on. I think this photo was a success because the shape of a square is easily identified.
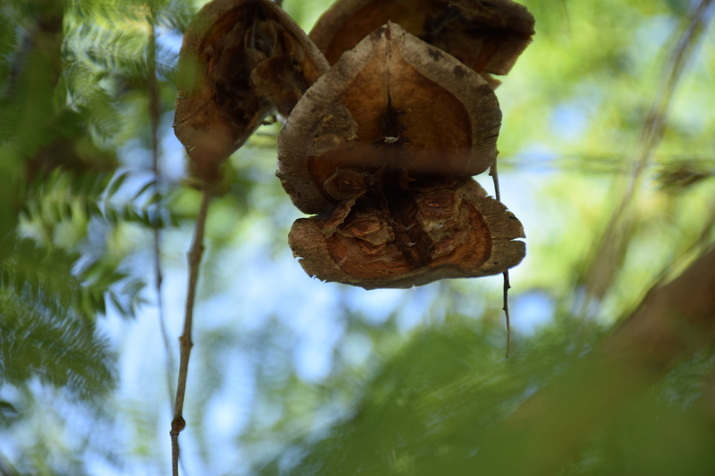
Form
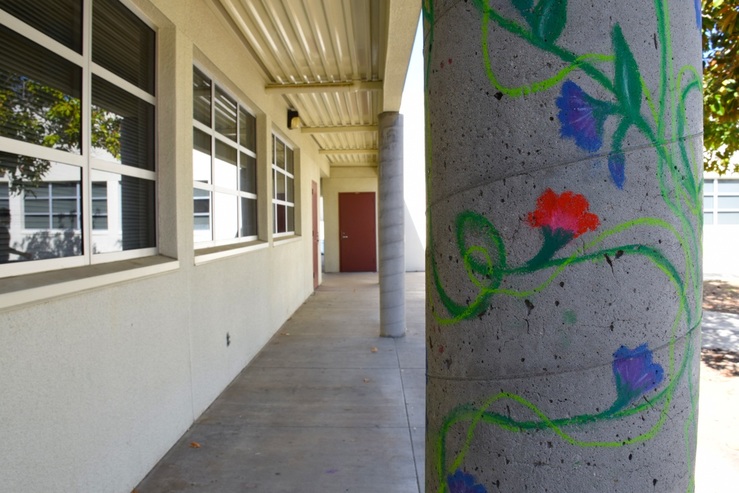
Aperture f/8, ISO 400, Shutter Speed 1/1500
This is a picture of a pole that has some chalk flowers on it. This photograph shows form because it has depth and looks three dimensional. I think this was a success because it shows highlights.
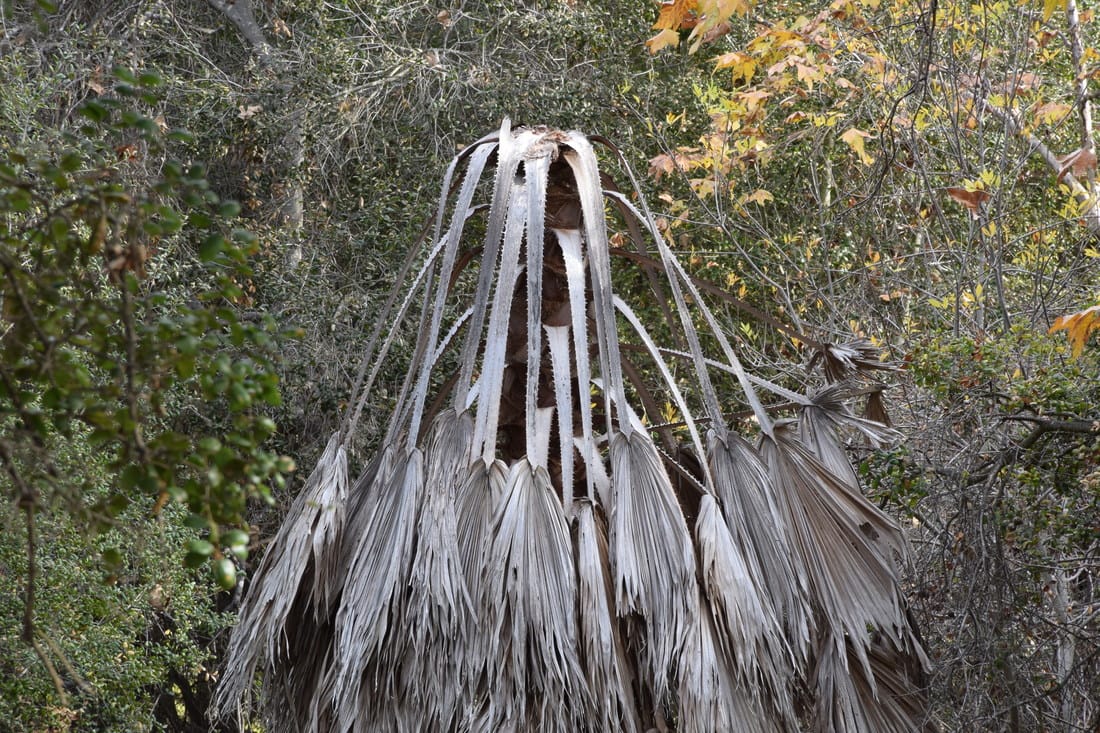
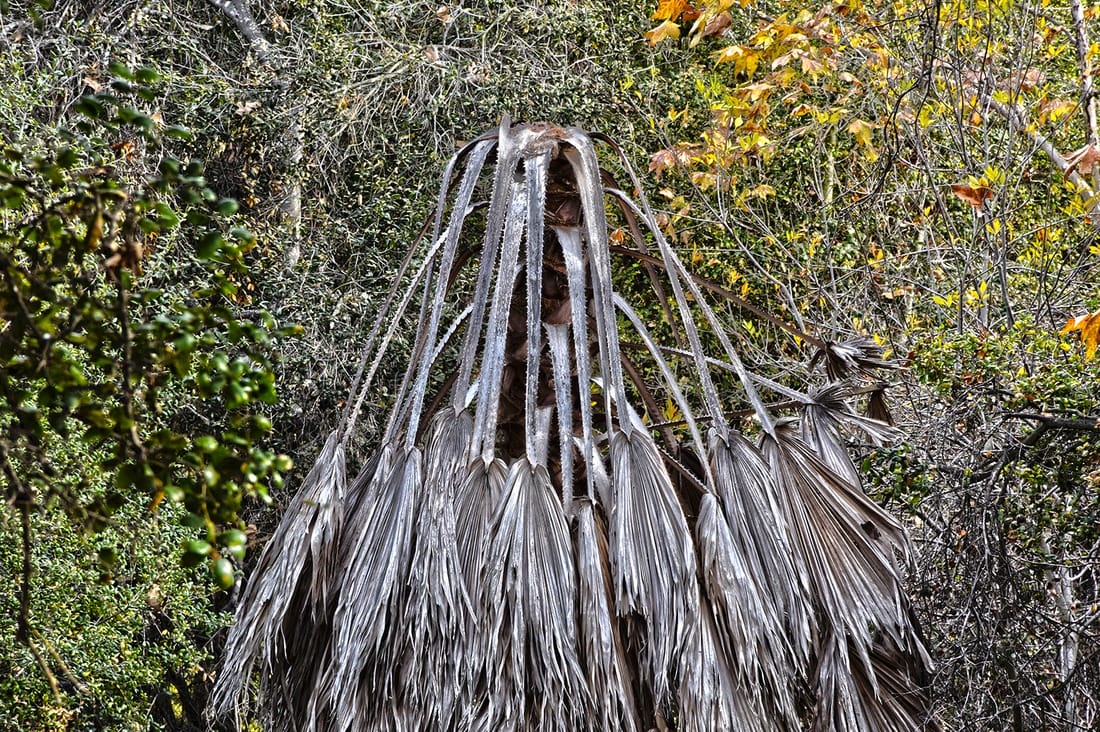
Texture
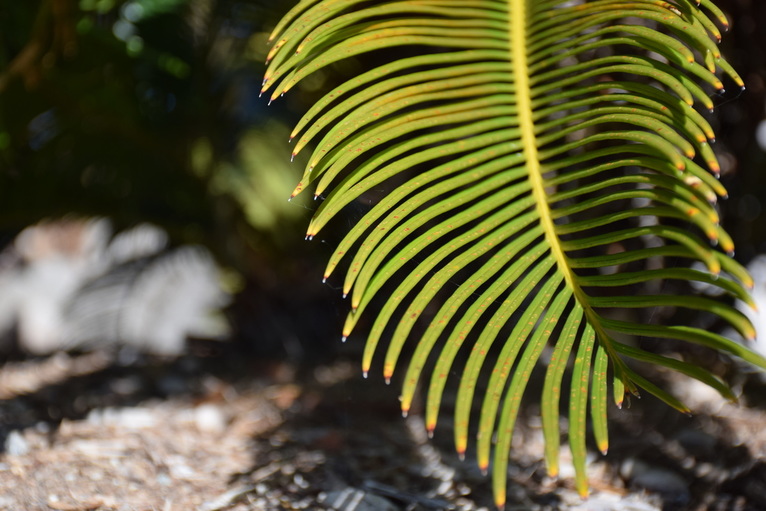
Aperture f/4.8, ISO 400, Shutter Speed 1/1500
This picture is of a palm tree that was around the lunch area. This shows texture because if you imagine your hand running down along it you can get a sense of how it feels. I think this was a success because it is two dimensional.
Space

Aperture f/8, ISO 400, Shutter Speed 1/2000
This picture is of a crow that just took off as he spreads his wings apart. The space in this picture is visible because the sky goes on and on and the main focus is around the crow. This picture was a success because it shows negative space.
Value
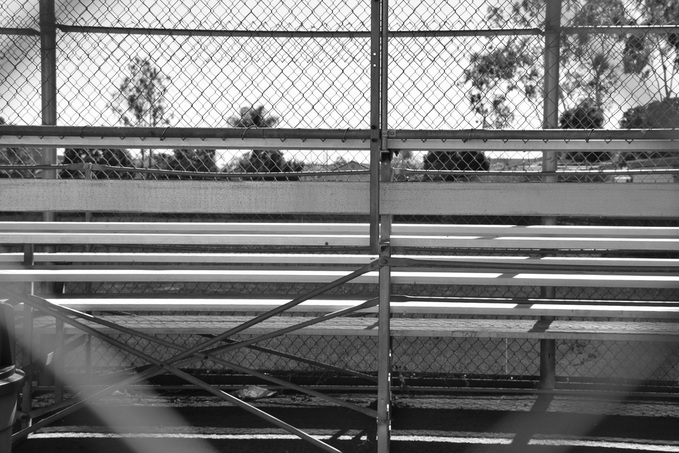
Aperture f/9.5, ISO 400, Shutter Speed 1/1000
This picture is of the bleachers on the baseball fields. This shows value because the lightness is visible and also a bit of darkness can be seen. I think this was a success because it has shades of black and white.
Elements and Principles of Photography.
Line
-A line is one dimensional and can vary in width, direction and length. Lines also can define the edges of a form. Lines can be horizontal, vertical, or diagonal, straight or curved, thick or thin. Lines lead your eye around the composition.
-A line is one dimensional and can vary in width, direction and length. Lines also can define the edges of a form. Lines can be horizontal, vertical, or diagonal, straight or curved, thick or thin. Lines lead your eye around the composition.
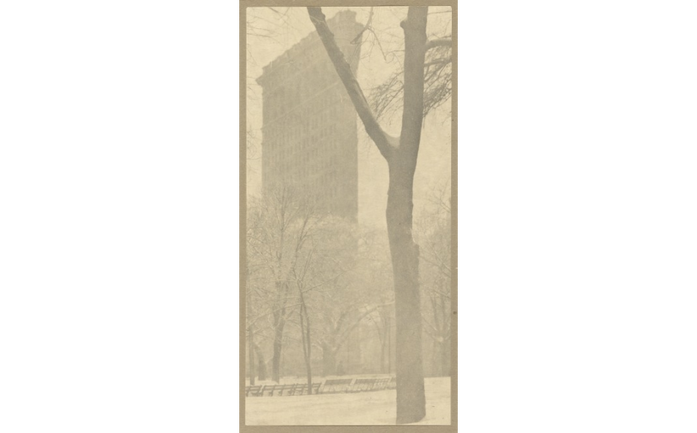
Alfred Stieglitz, The Flatiron Building, 1903, GettyMuseum
In this photograph there are a variety of lines used. The first thing we see is a tree which shows curved lines, but also in the background a building is visible and shows straight lines. this photo is a success because there are different types of lines and can be seen clearly.
Color
-Color has three main characteristics : hue ( red, yellow, green ), value (how light or dark it is), and intensity (how bright or dull it is). Colors can also be described as warm (red, yellow), or cool(blue, green).
-Furthermore, Monochromatic - one color plus its tints (adding white) and shades (adding black).
-Complimentary Colors- colors opposite each other on the color wheel.
-Analogous Colors - colors next to each other on the color wheel.
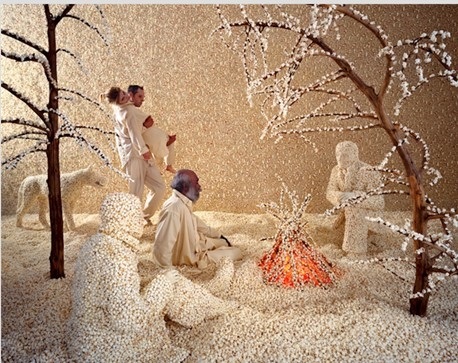
Sandy Skoglund, Raining Popcorn, 2001, artnet.com
The color used here is white which is represented with popcorn. As I look at this photo the white popcorn is also representing snow as the people are gathered around a fire. This picture was a success because I can clearly know what the color is and what it represents.
Shape
-Shape is two dimensional, with a height and width.
-Organic Shape - a shape made by nature. Not completely defined.
-Inorganic Shape - man made such as triangles and rectangles.
-Shape is two dimensional, with a height and width.
-Organic Shape - a shape made by nature. Not completely defined.
-Inorganic Shape - man made such as triangles and rectangles.
Laszlo Moholy-Nagy, T1, 1926, guggenheim.org
The shapes I see in this photo are circles and lines. By looking at this photo it is an inorganic shape since the cups could have been arranged by a person.
From
-Form is three dimensional, has height and width and depth.
-Photographers emphasize form by the use of highlights and shadows.
-Form is three dimensional, has height and width and depth.
-Photographers emphasize form by the use of highlights and shadows.
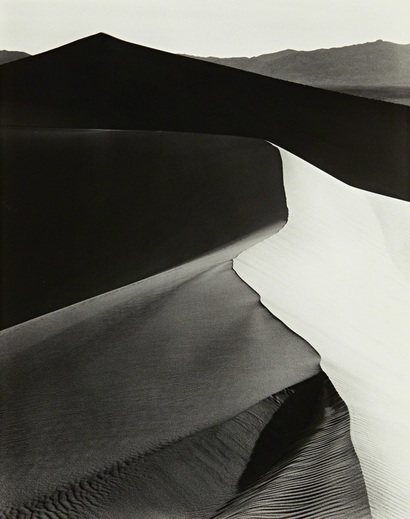
Ansel Adams, Sand Dunes, 1948, artsy.net
This photograph was a success because it is three dimensional and shows height and width. It also shows different shades of highlights and shade which makes it more dimensional.
Texture
-The surface quality of an object that we sense through touch. All objects have a physical texture (think- horsehair, dolphin smooth).
-In a two dimensional work, texture gives a visual sense of how an object depicted would feel in real life if touched.
-The surface quality of an object that we sense through touch. All objects have a physical texture (think- horsehair, dolphin smooth).
-In a two dimensional work, texture gives a visual sense of how an object depicted would feel in real life if touched.
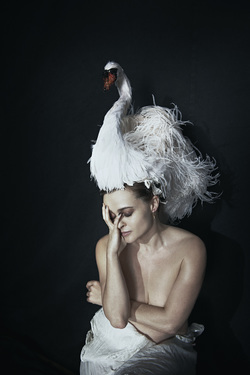
Peter lindbergh, Helena Bonham-Carter, 2012, peterlindbergh.com
By looking at this picture, the swan on her head shows texture. As the feathers are clearly seen it gives off the impression that it is smooth and really soft. This photo was a success as the viewer can sense the touch just by looking at it.
Space
-Real space is three dimensional. Space in a work of art refers to a feeling of depth or three dimensions. It can also refer to an artist’s use of the area around the picture plane.
-Positive Space - the space occupied by the primary object.
-Negative Space - the space around the primary object.
-Real space is three dimensional. Space in a work of art refers to a feeling of depth or three dimensions. It can also refer to an artist’s use of the area around the picture plane.
-Positive Space - the space occupied by the primary object.
-Negative Space - the space around the primary object.
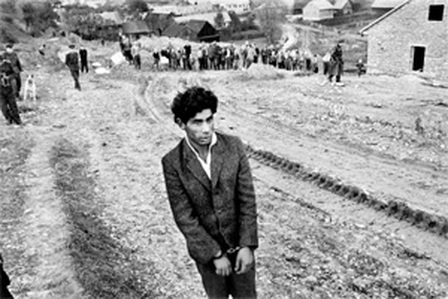
Josef Koudelka, Czechoslovakia, 1963, magnumphotos.com
The artist in this picture used negative space because the man is the main focus and there is nothing near him. Only in the background we can see people gathered around. This photo was a success because it shows that it was taken during a difficult period of time and really shows space.
Value
-Value is the lightness or darkness of a surface. It is frequently used when talking about shading, but also important in the study of color.
-Value is the lightness or darkness of a surface. It is frequently used when talking about shading, but also important in the study of color.
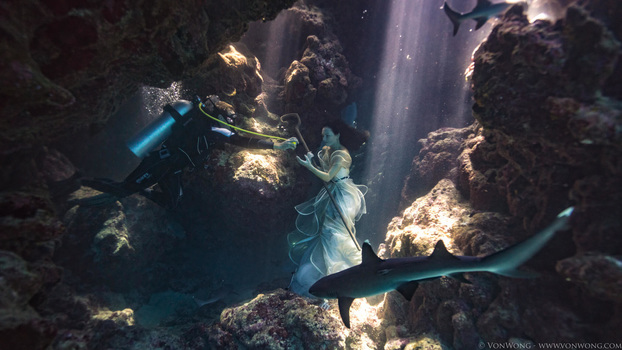
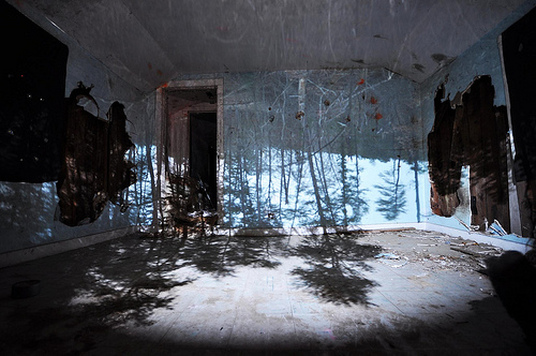
Ben Von Wong,
This photograph is a success because the lighting and darkness is perfectly shown. The lighting gives off the impression that it is a magical place and it looks unrealistic.
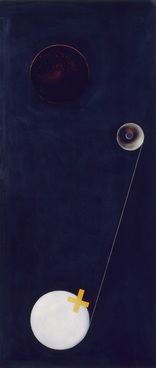
Balance
-Balance is similar to our physical sense of balance. It is how the artist uses opposing forces in a composition that results in visual stability.
-Most successful compositions achieve balance in one of two ways : symmetrically (the same on both sides, like a butterfly wing) or asymmetrically.
-Balance is similar to our physical sense of balance. It is how the artist uses opposing forces in a composition that results in visual stability.
-Most successful compositions achieve balance in one of two ways : symmetrically (the same on both sides, like a butterfly wing) or asymmetrically.
Annie Leibovitz
Proportion
-Proportion relates to the relative size and scale of the various elements in a design. Specifically, the relationship between the objects.
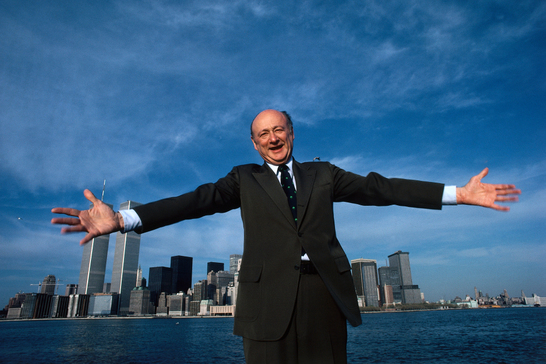
Neil Leifer, Ed Koch-New York, 1981, Neilleifer.com
This photograph was a success because the man in the picture looks like he is bigger than the city. This shows proportion as the artist took this picture with worm's eye view which make the man look taller.
Rhythm
-Rhythm in an artwork indicates movement by the repetition of elements. Rhythm can make an artwork seem active.
-Rhythm in an artwork indicates movement by the repetition of elements. Rhythm can make an artwork seem active.

Robert Capa, Barcelona , 1939, magnumphotos.com
With the blurriness in the background and the focus on the woman and dog rhythm is shown in this photograph.
Emphasis
-Emphasis is to make one part of an artwork dominant over the other parts. It attracts the viewer’s eyes to a place of special importance in an artwork.
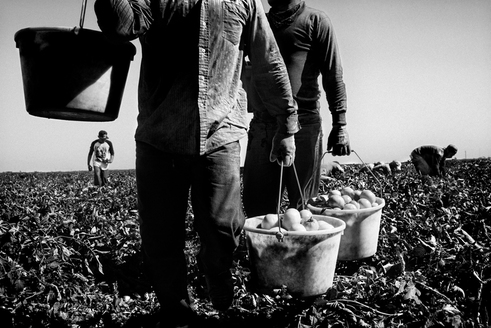
Matt Black, Tomato Harvest, Mattblack.com
Harmony
-Harmony is the pleasing quality achieved by different elements of a composition interacting to form a whole. Harmony is often accomplished through reception of the same or similar characteristics.
-Harmony is the pleasing quality achieved by different elements of a composition interacting to form a whole. Harmony is often accomplished through reception of the same or similar characteristics.
Joel Meyerowitz, From the car, 1974, howardgreenberg.com
Variety
-Differences achieved by opposing, contrasting, changing, elaborating, or diversifying elements in a composition to add individualism and interest.
-Differences achieved by opposing, contrasting, changing, elaborating, or diversifying elements in a composition to add individualism and interest.
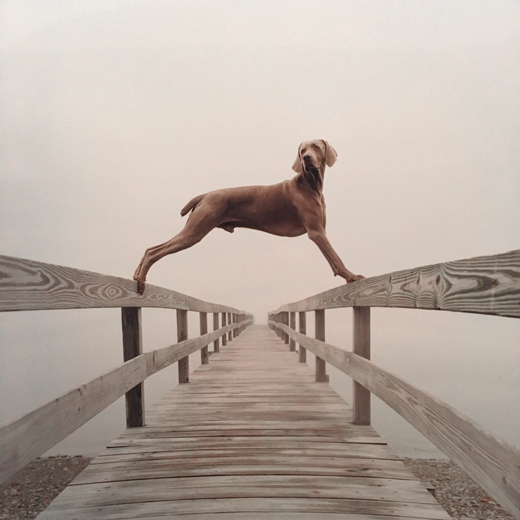
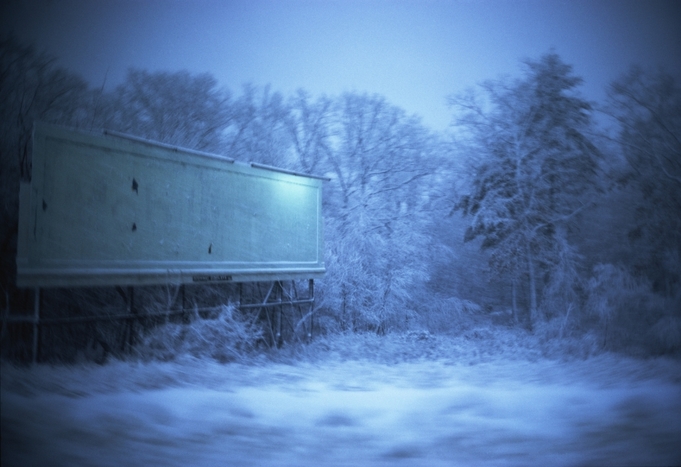
William Wegman,Covered Bridge, 2002, panopticongallery.com
Unity
-Unity is the result of bringing the elements of art into the appropriate ratio between harmony and variety to achieve a sense of oneness. It is the sense that everything works together and looks like it fits.
-Unity is the result of bringing the elements of art into the appropriate ratio between harmony and variety to achieve a sense of oneness. It is the sense that everything works together and looks like it fits.

Mary Ellen Mark, Harlem Street Life, 1966, maryellenmark.com
This picture was a success because it shows unity
Fast Shutter Speed.
Shutter Speed 1/1000, Aperture f/5.6, ISO 1600
|
Shutter Speed 1/1000, Aperture f/9.5, ISO 1600
|
Shutter Speed 1/1000, Aperture f/8, ISO 1600
|
Shutter Speed 1/1000, Aperture f/6.7, ISO 1600
|
Shutter Speed 1/1000, Aperture f/6.7, ISO 1600
|
Shutter Speed 1/1000, Aperture f/8, ISO 1600
|
Shutter Speed 1/1000, Aperture f/8, ISO 1600
|
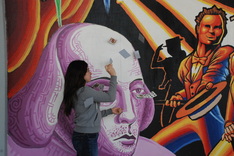
Respect.
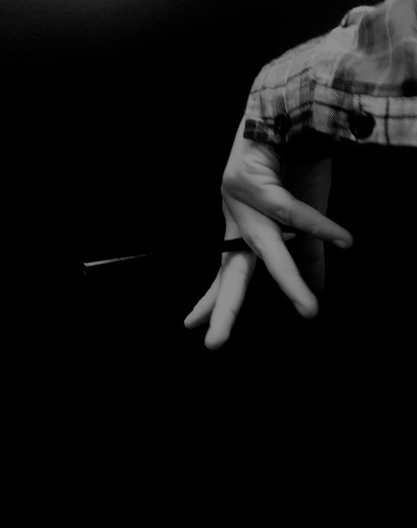
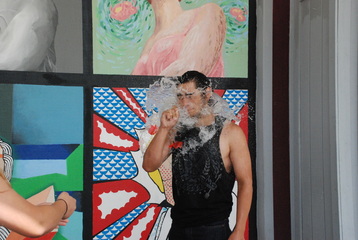
Your Life Is In Your Hands.
My photograph represents how your life is in your hands. As I was taking this photo I wasn’t sure how the outcome would be, but it turned out good. The reason I chose this photo and not another one was because the background had red which would symbolize the red ribbon for being drug free.
The first thing I did with my photograph was duplicate the layers. The Second layer I made it to black and white so that the red would be the main focus. With the two layers I started to erase where the poles were because they were red. Since the red in my picture was dull I decided to make it brighter which made it better. The last thing I did was merge layer so that it would all be one photo.
The first thing I did with my photograph was duplicate the layers. The Second layer I made it to black and white so that the red would be the main focus. With the two layers I started to erase where the poles were because they were red. Since the red in my picture was dull I decided to make it brighter which made it better. The last thing I did was merge layer so that it would all be one photo.
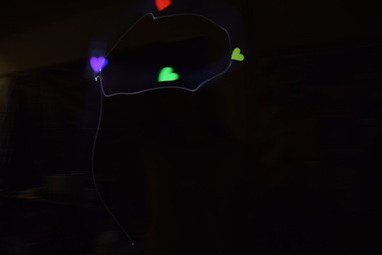
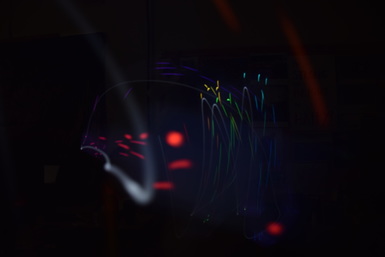
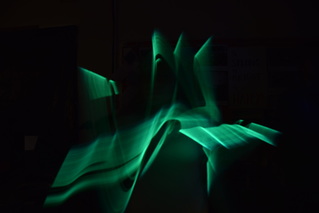
Light Painting.
Shutter Speed 6.0, ISO 100, Aperture f/3.5
Shutter Speed 6.0, ISO 100, Aperture f/3.5
|
Shutter Speed 6.0, ISO 100, Aperture f/3.5
Shutter Speed 6.0, ISO 100, Aperture f/3.5
|
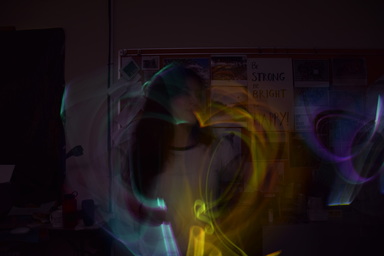
Shutter Speed 6.0, ISO 100, Aperture f/3.5
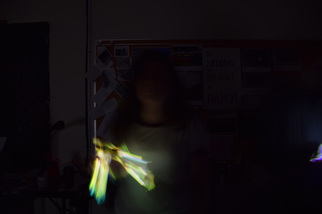
Shutter Speed 6.0, ISO 100, Aperture f/3.5
|
To create light painting you need a camera, tripod, glow sticks or you can download a light painting app. To achieve light painting you need to be in a dark room and your camera on manual mode and manual focus. All you need to do is have a person stand in front of the camera and move around their glow sticks or their phone.
Shutter Speed.
Shutter Speed f/16, Aperture 1/3, ISO 100
Shutter Speed f/11, Aperture 1/30, ISO 100
Shutter Speed f/8, Aperture 1/60, ISO 100

Shutter Speed f/4, Aperture 1/250, ISO 100
Shutter Speed f/2, Aperture 1/1,000, ISO 100
To change the camera to be shutter priority switch the dial to S and then it will capture movement. As you increase the aperture your photos will be clearer. You would want to use shutter speed when you want to capture a photo of a moving object.
Shutter Speed.
- Shutter Speeds are both a technical and aesthetic choice a photographer needs to make before releasing shutter.
- The shutter inside your camera controls the duration of time the sensor is exposed to light.
- Capturing blur or motion in your photograph can emphasize movement and add more drama.
- A fast shutter speed is often utilized to freeze the movement of a subject.
- A slower shutter speed can be used to show motion and visualize movement.
- Shutter speeds are expressed as seconds or fractions of seconds.
- As a general rule to prevent unintentional camera shake you should avoid handholding your digital camera at shutter speed slower than 1/ 2x Focal length.
- Using a tripod can help eliminate camera shake when using slower shutter speeds.
- The visual blur and suggestion of movement occurs because the subject is moving against a static background.
- Layering motion of a different subjects moving different directions at different speeds can set up an interesting
- Fast shutter speeds can make normal subjects appear to freeze in the air.
- When photographing people running relatively close to the camera a shutter speed of 1/1000 second or faster should freeze most motion.
- The distance the subject is from the camera, the speed of the subject, and the focal length of the lens will affect whether the subject is sharp or blurred.
- Slow shutter speed can help convey the idea of motion and movement.
- Slow shutter speeds combined with panning can help isolate the subject from a busy and distracting background.
- A tripod combined with a long exposure can capture the fireworks trials.
- Water movement can be emphasized with long exposures.
Daguerrotype.
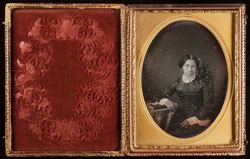
The inventor of daguerreotype was Louis Daguerre in 1844, and it was the first publicly photographic process. To make a daguerreotype first polish a sheet of silver plated copper to a mirror finish. Treat with fumes that make its surface light sensitive. Next expose it in a camera for a few seconds for brightly sunlit subjects or longer for an intense lighting. Make it visible by fuming it with mercury vapor and remove its sensitivity to light by liquid chemical treatment. Finally rinse and dry then seal the results behind glass in a protective enclosure.
Cyanotype.
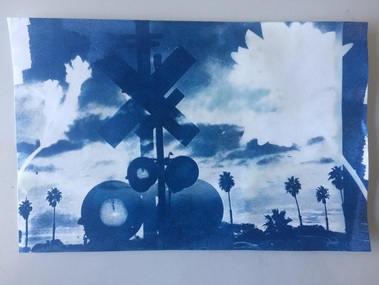
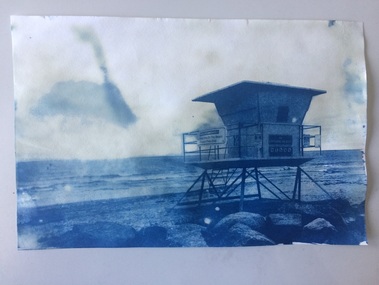
The inventor of cyanotype was Sir John Herschel who was an astronomer and scientist. He discovered cyanotype in the 19th century as he was working on photography. Herschel came up with the process that produces a blue and white image based on the salts of iron. First to create a cyanotype you need to have a solution 25 grams of Ferric ammonium citrate added to 100 ml of water, have a second solution of 10 grams of Potassium ferricyanide added to 100 ml of water. Next mix equal parts of the solution and coat a piece of watercolor paper. using the contact printing method expose the paper to full sun fro 15-20 minutes. The yellow emulsion should turn to a steel blue gray color. When developing rinse in water until stain clears. Use 3% of Hydrogen peroxide for enhanced blues. Last thing to do is air dry.
|
|
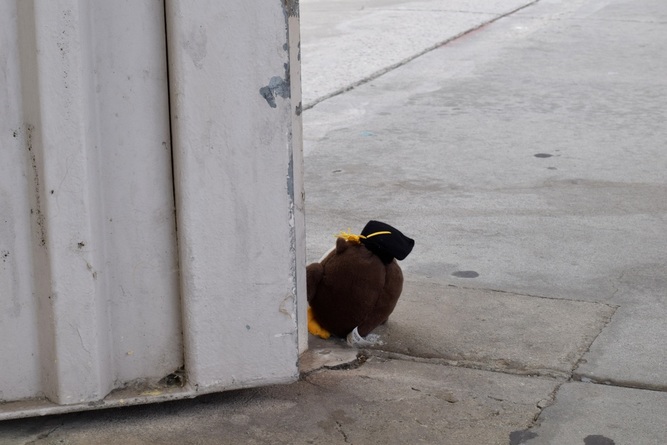
Toy Story.
The Fugitive
Prison Break, Aperture f/1.8, Shutter Speed 1/4,000 of a second, ISO 400
Professor X has planned the best way to escape from prison and nothing would be able to stop him from leaving. His plan was to leave and never be caught again.

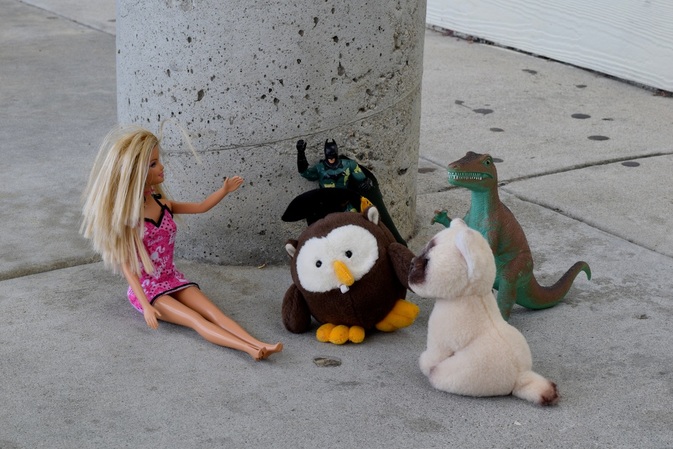
The Office, Aperture f/11, Shutter Speed 1/640 of a second, ISO 400
Back at the police station Team 182 had just heard the news that professor X had escaped from prison. They were given the assignment to capture him or else they would be in trouble. As Team 182 gathered all there information and tracked down professor X they were on there way to capture him.
Fugitive Aperture f/16, Shutter Speed 1/125 of a second, ISO 400
Team 182 had spotted professor X turning in an ally. Team 182 decided to split up and and try to capture him by surrounding him. Professor X had no idea he was being followed by the police. He was only thinking about finally being free.
Surrounded Aperture f/16, Shutter Speed 1/100 of a second, ISO 400
Professor X had been surrounded by Team 182, he was surprised to see them there as he had no clue he was being followed. Professor X tried to escape but couldn't which led them to start a fight. As they were fighting Team 182 started fighting each other instead of professor X.
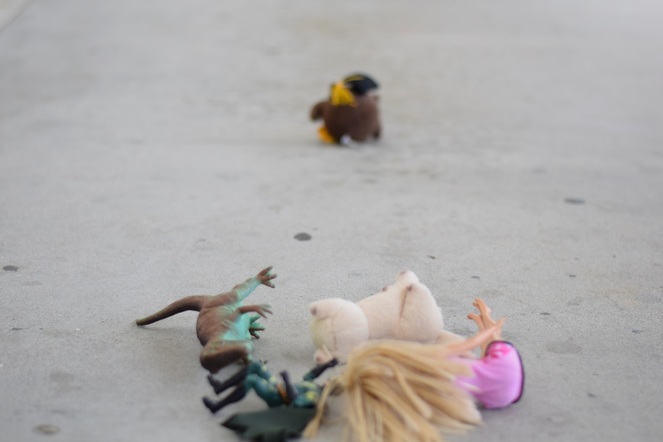
Aperture f/1.8, Shutter Speed 1/4,000 of a second, ISO 400
Professor X took the opportunity to leave while Team 182 was fighting each other. Soon he was free again and escaped from Team 182. He was never seen again.
Aperture.
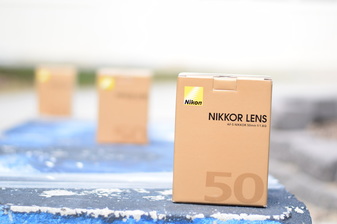
Aperture f/1.8, Shutter Speed 1/2000th of a second, ISO 200
|
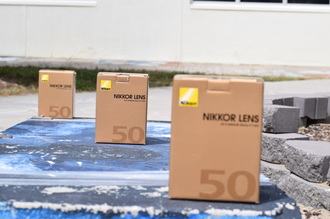
Aperture f/8, Shutter Speed 1/100th of a second, ISO 100
|
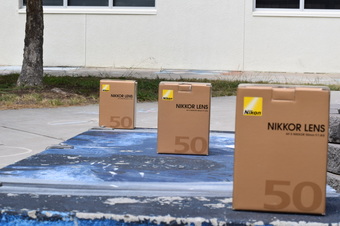
Aperture f/16, Shutter Speed 1/25th of a second, ISO 200
By looking at the photos I can tell that the focus is different in each one. The first photo with an aperture of f/1.8 it shows the depth of field and that only on box is being focused on, the rest is blurred out. With the second photo the aperture is f/8 and the DOF appears to be better than the first one but it is still not focused on everything. On the third photo the aperture is f/16 and everything is being focused on.
Digital Camera Basics.
DSLR
DSLR stands for digital single lens reflex
A DSLR is a digital camera that uses mirrors to direct light from the lens to the viewfinder, which is a hole on the back of the camera that you look through to see what you are taking a picture of.
Exposure
Exposure is the amount of light collected by the sensor in your camera during a single picture.
If the shot is exposed too long the photograph will be washed out.
If the shot is exposed too short the photograph will appear too dark.
Almost all cameras today have light meters which measure the light in the given shot and set an ideal exposure.
The three primary controls your camera uses for exposure and aperture, shutter speed, and ISO.
Before taking a photo consider these three things : Aperture, Shutter Speed, ISO.
Aperture in Camera
Simply put, aperture is a hole within the lens, through which light travels into the camera body.
It is easier to understand the concept if you just think about our eyes. Every camera that we know of today is designed like human eyes.
Size of Aperture - Large vs. Small Aperture
In photography, aperture is exposed in f-numbers (for example f/5.6). These f-numbers that are known as “f-stops’ are a way of describing the size of the aperture, or how open or closed the aperture is.
A smaller f-stop means a larger aperture
Aperture basics
Small apertures ( high f/numbers ie f/22) increase the depth of field, bringing both the main subject and background into focus.
Large apertures (low f/numbers ie f/2.8) soften background details.
Depth of field ( DOF) is the distance to which objects behind and in front of the focal point appear to be in focus.
Shutter Speed
Shutter speed, aka “exposure time”, stands for the length of time a camera shutter is open to expose light into the camera sensor.
If the shutter speed is fast , it can help to freeze action completely.
If the shutter speed is slow it can create an effect called “motion blur”, where moving objects appear blurred along the direction of the motion.
How shutter speeds are measured
Shutter speeds are typically measured in fractions of a second, when they are under a second.
Rule of thumb for shutter speed
The slowest shutter speed for handheld photography is 1/60 / Anything lower then that should either be on a tripod or on a straight solid surface.
Any slower handheld shutter speed begins to get motion blur and your photograph
ISO
ISO is the level of sensitivity of your camera to available light.
The lower the ISO number the less sensitive it is to the light, while a higher ISO number increases the sensitivity of your camera
General rule of thumb
Bright and sunny, 100 iso
cloudy 250 iso
Indoor 500 iso
Nighttime without a flash 1600 iso
Modes on the DSLR
M- manual control over aperture and shutter
A - aperture priority
S - shutter priority
P - camera sets shutter speed and aperture
How to hold DSLR
Have the camera strap around your neck at all times
Hold the camera by the lens and hand grip if possible - treat with care.
Camara Obscura.
 Camara Obscura
Camara obscura is the first thing photography students learn, it is so basic and simple anyone can do it. The room needs to be very dark with a small hole in one wall. If the hole is small it will produce a very sharp image, but a slighltly bigger hole will produce a brighter picture. The image will be upside down.
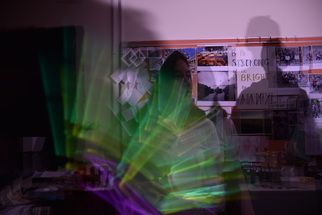
Surrealistic Selfie.
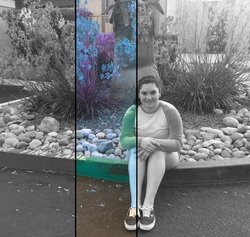
The first thing I did to the image was crop it, then I adjusted the hue to make the background look purple and blue. i then adjusted the saturation to 20. After I add the helena effect. This effect made the picture look black and white with the black lines.
